Unique Wooden Candle Holder Designs for Every Room in Your Home

Unique Wooden Candle Holder Designs for Every Room in Your Home

Unique Wooden Candle Holder Designs for Every Room in Your Home

Candlelight has a magical way of transforming a space, adding warmth, ambiance, and a touch of serenity. And what better way to showcase your flickering flames than with a beautiful and unique wooden candle holder? Wood, with its natural beauty and versatility, offers endless possibilities for creating eye-catching and functional designs. Whether you're seeking rustic charm, modern elegance, or something in between, wooden candle holders can elevate the décor of every room in your home.

Embracing Rustic Charm

For a cozy and inviting atmosphere, rustic wooden candle holders are a perfect choice. Imagine a chunky, weathered log transformed into a candle holder with a simple, yet elegant design. These holders often feature natural bark accents or knots, showcasing the raw beauty of the wood. To add a touch of warmth, consider holders with a distressed finish or a light stain that highlights the wood's grain. These rustic pieces are perfect for living rooms, bedrooms, or even your porch, bringing a touch of nature indoors.

Creative Rustic Ideas

  • Reclaimed wood candle holders: Give old wood a new life by crafting a unique candle holder. Look for weathered pieces like old barn wood or salvaged pallets.
  • Tree stump candle holders: Transform a slice of a tree trunk into a stunning centerpiece. You can leave the bark intact or carve out a simple design.
  • Driftwood candle holders: Embrace the beachy vibe with driftwood candle holders. These naturally sculpted pieces offer a unique and organic aesthetic.

Modern Elegance with Wood

Wood can be just as sleek and contemporary as any other material. Modern wooden candle holders often feature clean lines, geometric shapes, and minimalist designs. Choose holders with a smooth, polished finish, perhaps in a dark wood like walnut or ebony. These minimalist pieces add a sophisticated touch to modern living spaces, dining rooms, or even home offices. They can be used to create a calming and focused atmosphere, making them perfect for meditation or relaxation.

Modern Wooden Candle Holder Ideas

  • Geometric candle holders: Embrace the modern aesthetic with holders that feature geometric shapes like triangles, squares, or cylinders.
  • Metal and wood combinations: Combine the warmth of wood with the sleekness of metal for a truly modern look. Look for holders with brass accents, or those where wood frames a metal base.
  • Scandinavian-inspired designs: Embrace the simplicity and functionality of Scandinavian design with holders featuring clean lines and natural wood finishes.

Beyond the Ordinary: Unique Wooden Candle Holder Designs

For those seeking truly one-of-a-kind designs, the possibilities are endless. Artisans and woodworkers are pushing boundaries, creating intricate, handcrafted wooden candle holders that are both functional and artistic. From intricate carvings and laser-cut designs to holders that incorporate natural elements like shells or stones, these pieces are statement makers. Consider a wooden candle holder that resembles a miniature sculpture or one that incorporates sustainable materials and eco-friendly practices.

Unique Wooden Candle Holder Inspiration

  • Sculptural designs: Seek out holders that have been crafted into unique shapes, mimicking natural forms or abstract ideas.
  • Intricate carving: Look for holders that showcase intricate carvings, perhaps featuring floral motifs, animal designs, or geometric patterns.
  • Personalized designs: Commission a custom-made wooden candle holder that incorporates a special message, date, or personal symbol.

Wooden candle holders are more than just functional accessories; they are pieces of art that bring warmth, light, and personality to your home. Whether you choose a rustic, modern, or uniquely crafted design, let the natural beauty of wood illuminate your space and inspire a sense of tranquility and comfort.

Share:

How to Build Floating Shelves for a Sleek, Contemporary Look

How to Build Floating Shelves for a Sleek, Contemporary Look

Elevate Your Space: Building Sleek Floating Shelves for a Contemporary Vibe

Floating shelves offer a contemporary, minimalist aesthetic that instantly elevates any room. They create a sense of spaciousness and showcase your prized possessions in a stylish way. This guide will walk you through the process of building your own floating shelves, empowering you to personalize your space and add a touch of sophistication.

Choosing Your Materials

The first step is to select the materials that will best suit your design vision and the weight of the items you plan to display. Consider these factors:

Wood Type

Opt for a wood with a clean, contemporary feel, like:

  • Maple: Known for its light color and smooth grain.
  • Walnut: Boasts a rich, dark hue and distinctive grain pattern.
  • Birch: Offers a pale, slightly reddish tone and a fine, consistent grain.
  • Oak: Provides a sturdy, traditional option with a pronounced grain.

Thickness

The thickness of the shelf will determine its stability and aesthetic. A thickness of ¾ to 1 inch is recommended for most applications.

Hardware

Select strong, durable hardware that will seamlessly integrate into the design:

  • Concealed Brackets: These are ideal for achieving a truly floating look. Choose brackets made from metal or sturdy plastic.
  • Screws: Use screws that are long enough to securely fasten the brackets to the wall and the shelf to the brackets.

Planning and Measuring

Before you begin cutting and assembling, take accurate measurements and plan the placement of your shelves.

Determine Shelf Placement

Decide on the height and spacing of your shelves. Use a level to ensure your shelves will be perfectly aligned. Mark the wall using a pencil to indicate the desired shelf locations.

Measure and Cut

Cut your wood to the desired lengths using a miter saw, circular saw, or hand saw. Make sure the cuts are precise for a clean, professional look. Use sandpaper to smooth the edges and create a polished finish.

Installing the Shelves

Now, it's time to bring your design to life.

Attaching Brackets

Locate and mark the positions for your brackets on the wall. Using a drill and the appropriate drill bit, create pilot holes to prevent the wood from splitting. Secure the brackets to the wall using screws.

Mount the Shelves

Position the shelves onto the brackets and secure them using the chosen screws. Ensure the shelves are level and aligned. If using concealed brackets, ensure the screws are completely concealed behind the shelves for a clean and seamless finish.

Finishing Touches

Once your shelves are installed, take a step back and admire your handiwork. Add these final touches to complete your design:

Stain or Paint

Apply a stain or paint to enhance the natural beauty of the wood or to create a desired color scheme. Allow the finish to dry completely before adding any items to the shelves.

Decorate

Showcase your style with carefully curated objects, books, or artwork. Arrange items strategically to create visual interest and balance. Consider the color palette and overall theme of your space.

Now that you've successfully built and installed your floating shelves, you can bask in the satisfaction of creating a custom design element that elevates your room. As you admire your handiwork, remember the endless possibilities and the unique personality your floating shelves bring to your space.

Share:

Rustic Wood Picture Frames for Craft Markets

Rustic Wood Picture Frames for Craft Markets

Rustic Wood Picture Frames: A Perfect Addition to Your Craft Market Stall

Looking for a handmade product that screams "cozy cabin" and "farmhouse chic"? Look no further than rustic wood picture frames! These charming frames are a hot commodity at craft markets, appealing to a wide range of customers who appreciate the natural beauty and unique character of wood. They're not just frames; they're little pieces of art themselves!

But don't just take my word for it. Let's dive into the reasons why rustic wood picture frames are a fantastic choice for your craft market business.

Why Rustic Wood Picture Frames Are a Winner

Here's the deal: people are drawn to the rustic aesthetic. It brings a sense of warmth, comfort, and connection to nature. These frames fit perfectly into this trend, adding a touch of handcrafted charm to any space.

Uniqueness and Versatility

Each piece of wood has its own unique grain pattern, knots, and character. This means that no two frames will ever be exactly alike, making them truly one-of-a-kind. They can be styled in countless ways, from minimalist and modern to shabby chic and farmhouse. This versatility allows you to cater to a broad range of tastes.

High Perceived Value

Handmade items, especially those made with natural materials like wood, are perceived as higher quality and more valuable. This allows you to price your frames competitively and still make a good profit. The craftsmanship and attention to detail will speak for themselves!

Endless Customization Options

The beauty of rustic wood picture frames is that you can personalize them in so many ways. Think about offering:

  • Different wood types: Oak, pine, walnut, reclaimed wood â€" each has its own unique look and feel.
  • Various sizes and shapes: Square, rectangle, round, oval â€" cater to different picture sizes and styles.
  • Finishing options: Natural, stained, painted, distressed, weathered â€" unleash your creativity and offer a range of finishes to match different decor.
  • Embellishments: Add a touch of flair with rope, twine, burlap, metal accents, or even dried flowers.

Customization adds value and allows customers to truly make the frame their own, making them even more special.

Crafting Your Rustic Wood Picture Frames

Now, let's talk about the fun part â€" actually making these beauties! Here's a breakdown of the process:

1. Gathering Your Materials

You'll need:

  • Wood (look for salvaged wood for a more rustic look)
  • Saw (for cutting the wood)
  • Sandpaper (for smoothing the edges and creating a consistent surface)
  • Clamps (for securing the frame pieces together)
  • Wood glue (for bonding the frame pieces)
  • Finishing supplies (stain, paint, sealant, etc.)
  • Hardware (hinges, picture hangers, glass or acrylic sheet)
  • Embellishments (optional)

2. Cutting and Assembling

Once you've gathered your materials, it's time to cut your wood to the desired dimensions. You can use a table saw, circular saw, or even a hand saw. Be sure to cut accurately and measure twice, cut once! Once you have your pieces, use wood glue and clamps to assemble the frame. Allow the glue to dry completely before proceeding to the next step.

3. Sanding and Finishing

Smooth out any rough edges and imperfections by sanding the frame. Start with a coarser grit sandpaper and then move to a finer grit for a smoother finish. Apply your chosen finish, whether it's a stain, paint, or sealant. Let the finish dry completely before adding hardware.

4. Adding Hardware and Embellishments

Attach the hinges and picture hangers to the back of the frame. You can also choose to add a glass or acrylic sheet to protect the artwork. Get creative with embellishments â€" add some rope, twine, or other decorative touches to give your frames a unique personality.

Selling at Craft Markets

Now you're ready to sell your creations! Here are some tips for success:

  • Showcase your frames beautifully: Use a variety of sizes, finishes, and embellishments to showcase your range. Arrange them in a visually appealing way, with a clear price tag for each frame.
  • Highlight your craftsmanship: Let people know you're creating handmade items and highlight the unique aspects of each frame. Tell stories about the wood you use and the process you follow.
  • Offer customization: Allow customers to choose the size, finish, and embellishments for their frames. This adds a personal touch and increases the value of your products.
  • Be engaging and friendly: Interact with customers, answer their questions, and offer suggestions. Your passion for crafting will be contagious!
  • Promote your business: Share photos of your frames on social media, create a website or Etsy shop, and consider participating in local craft fairs.

Commonly Asked Questions

What kind of wood should I use for rustic picture frames?

The best wood for rustic frames depends on the look you're going for. Pine is readily available, affordable, and has a beautiful grain pattern. Reclaimed wood is a great choice for a unique and eco-friendly look. Oak is more durable and has a timeless elegance. Experiment with different woods to see what fits your style.

How do I make my frames look more rustic?

To achieve a rustic look, consider using distressed finishes, weathered paint, or even a mix of both. Add knots, cracks, or imperfections to the wood. You can also use embellishments like burlap, rope, or metal accents that complement a rustic style.

What are some tips for pricing my rustic wood picture frames?

Factor in the cost of materials, your time investment, and the perceived value of your handmade creations. Research the prices of similar frames in your area. You can offer different pricing tiers based on the size, complexity, and materials used. Be confident in your pricing, as customers will recognize the quality and craftsmanship of your work.

So, there you have it! Rustic wood picture frames are a fantastic business opportunity, combining creative expression with a hot market trend. Get crafting, and watch your business flourish!

Share:

How to Build a Simple and Elegant Birdhouse for Your Yard

How to Build a Simple and Elegant Birdhouse for Your Yard

Building a Simple and Elegant Birdhouse for Your Yard

Hey there, bird lovers! Are you looking to add a touch of charm and wildlife to your backyard? Building a birdhouse is a fun and rewarding project that's perfect for beginners and experienced DIYers alike. Not only will you be providing a safe haven for feathered friends, but you'll also be creating a beautiful and unique addition to your landscape. Let's dive into the steps of crafting a simple and elegant birdhouse that's sure to attract birds and delight your senses!

Choosing the Right Materials

Before you start hammering and sawing, it's important to select the right materials for your birdhouse. You want something durable, weather-resistant, and attractive. Here are some popular choices:

Wood

Wood is a classic material for birdhouses, and for good reason! It's readily available, easy to work with, and naturally blends into the environment. Look for untreated cedar, redwood, or pine, as these woods are resistant to rot and decay.

Plywood

Plywood is a great option for budget-conscious builders. It's strong, stable, and readily available in various thicknesses. Choose a plywood that is exterior grade for optimal durability.

Recycled Materials

Get creative and use recycled materials to give your birdhouse a unique touch. Old crates, wooden boxes, or even discarded milk jugs can be repurposed into charming birdhouses. Just make sure the materials are clean and free of any harmful chemicals.

Planning Your Design

With your materials in hand, it's time to decide on the style and dimensions of your birdhouse. Consider these factors:

Bird Species

Different bird species have different preferences for their nesting sites. Research the birds that commonly visit your area and choose a design that suits their needs. For example, a small bird like a chickadee will prefer a smaller birdhouse, while a larger bird like a bluebird might require a more spacious design.

Entrance Hole Size

The size of the entrance hole is crucial for attracting the right birds. A general guideline is to choose a hole size that's slightly larger than the bird's head. Here are some examples:

  • Chickadees: 1.25 inches
  • Bluebirds: 1.5 inches
  • Wrens: 1 inch

Roof Style

Birdhouses can have various roof styles, each offering unique benefits. A simple gable roof is easy to build and offers good protection from the elements. A shingled roof adds a touch of elegance, while a flat roof with an overhang provides shade.

Ventilation

Ensure proper ventilation to prevent overheating and mold growth. Include small vents on the sides or roof of the birdhouse.

Building the Birdhouse

Now that you've planned your design, let's get our hands dirty! Here's a step-by-step guide to building a simple birdhouse:

Step 1: Cut the Pieces

Use a saw to cut the wood or plywood according to your design plans. You'll need pieces for the base, walls, roof, and entrance hole.

Step 2: Assemble the Walls

Join the walls together using wood glue and nails or screws. Make sure the corners are square and tight.

Step 3: Create the Entrance Hole

Cut the entrance hole in the front wall using a drill bit or jigsaw. Ensure the hole is the appropriate size for the bird species you're targeting.

Step 4: Attach the Roof

Cut the roof pieces and attach them to the walls using glue and nails or screws. If you're using a gable roof, create a slight overhang to protect the entrance from rain.

Step 5: Add Ventilation

Drill small ventilation holes on the sides or roof of the birdhouse to ensure proper airflow.

Step 6: Paint or Stain (Optional)

If desired, paint or stain the birdhouse for added protection and aesthetics. Choose colors that blend with your surroundings or create a bold statement.

Installing Your Birdhouse

You've created a beautiful birdhouse! Now it's time to find the perfect spot for it in your yard. Consider these factors:

Location

Choose a location that's sheltered from strong winds and direct sunlight. A spot under a tree or on the side of a building works well.

Height

Install the birdhouse at a height that's comfortable for the birds you want to attract. Most birds prefer a height of 5-10 feet.

Predator Protection

Place the birdhouse away from dense vegetation or areas where predators might easily access it. You can also add a predator guard around the base of the birdhouse to deter cats or snakes.

Caring for Your Birdhouse

Once your birdhouse is installed, it's important to maintain it for optimal use. Here are a few tips:

Clean Regularly

Clean the birdhouse at least once a year, especially after nesting season. Remove old nesting materials and disinfect the interior with a mild bleach solution. This helps prevent the spread of diseases and parasites.

Monitor for Damage

Inspect the birdhouse regularly for signs of damage or wear and tear. Repair any cracks or holes to ensure it remains a safe and comfortable habitat for birds.

Enjoy Watching the Birds

The most rewarding part of building a birdhouse is watching the birds enjoy their new home. Sit back, relax, and enjoy the beauty and tranquility of nature!

Building a birdhouse is a wonderful way to connect with nature and add a touch of wildlife to your backyard. With a little effort and creativity, you can create a charming and functional birdhouse that will attract feathered friends for years to come. So grab your tools, gather your materials, and get ready to build your own little piece of paradise!

Share:

Diy guide to making a desk with a wood top and metal legs

Diy guide to making a desk with a wood top and metal legs

Craft a Custom Desk: Wood Top & Metal Legs

Ready to build a desk that’s as unique as you are? This DIY guide will walk you through the process of crafting a stylish and functional desk with a wood top and sleek metal legs. This project might seem intimidating, but with clear instructions and a bit of patience, you’ll be creating your dream workspace in no time.

Gather Your Supplies

Before you get started, gather all the materials and tools you’ll need. This project will require a combination of wood, metal, and hardware. Don’t worry, you can adapt the design to your taste and existing supplies!

For the Wood Top:

  • Wood planks: Choose your desired wood type â€" think sturdy hardwoods like oak, maple, or walnut for a classic look, or opt for pine or plywood for a more affordable option. Calculate the dimensions you need for your tabletop, taking into account the desired width, depth, and any overhang you want.
  • Wood glue: A good wood glue is essential for creating strong joints.
  • Wood screws: Choose screws that are long enough to securely fasten the planks together.
  • Wood filler: To fill any gaps or imperfections in the wood, have some wood filler on hand.
  • Sandpaper: A variety of grit sandpaper will be used to smooth the wood before and after finishing.
  • Wood finish: Choose a finish that complements your style and provides the desired level of protection. Options include paint, stain, or varnish.

For the Metal Legs:

  • Metal legs: Choose legs that fit your style, whether you prefer minimalist hairpin legs, industrial-style pipe legs, or something more ornate.
  • Metal brackets or plates: These are essential for securely attaching the legs to the tabletop.
  • Screws or bolts: These will be used to attach the brackets or plates to the tabletop and legs.
  • Drill: A drill with the appropriate bits for drilling pilot holes and attaching the hardware is a must-have.
  • Level: Ensure your desk is perfectly level using a level.

Constructing the Wood Top

Now it’s time to create the foundation of your desk: the wood top.

Joining the Planks

Start by joining the wood planks together. If you’re using multiple planks, ensure they are all the same thickness and aligned flush. Apply wood glue to the edges and clamp the planks together. Allow the glue to dry thoroughly according to the manufacturer’s instructions. Secure the planks with wood screws for extra stability.

Sanding the Wood Top

Once the glue is dry, sand the surface of the tabletop to create a smooth and even finish. Use a progressively finer grit of sandpaper, starting with a coarser grit to remove any rough edges or imperfections and finishing with a fine grit for a smooth finish.

Finishing the Wood Top

Now it’s time to add the finishing touches. Apply your chosen wood finish, whether it’s paint, stain, or varnish, following the manufacturer’s directions carefully. Let the finish dry completely before moving on.

Attaching the Metal Legs

Now for the final step: attaching those stylish metal legs.

Positioning the Legs

Determine where you want to place the legs on your tabletop. Make sure they are evenly spaced for balance and stability. You can use a measuring tape to ensure precise placement.

Attaching the Brackets or Plates

Use the provided hardware to attach brackets or plates to the underside of the tabletop at the locations you marked for the legs. If needed, pre-drill pilot holes to prevent the wood from splitting.

Securing the Legs

Finally, attach the metal legs to the brackets or plates using screws or bolts. Make sure the legs are firmly and securely fastened.

Final Touches

Congratulations! You’ve successfully built your custom desk. Now take a moment to admire your handiwork. But before you start decorating, give the entire desk a final cleaning to remove any dust or debris from the construction process.

You can also consider adding some finishing touches to personalize your desk even further. Some ideas include:

  • Adding a decorative shelf or drawer
  • Applying a protective coating, like a clear sealant, to protect your tabletop from scratches and stains.
  • Adding a custom label or inscription to personalize your desk.

With your new custom desk, you’ll have a workspace that reflects your unique style and is perfectly suited to your needs. Happy crafting!

Share:

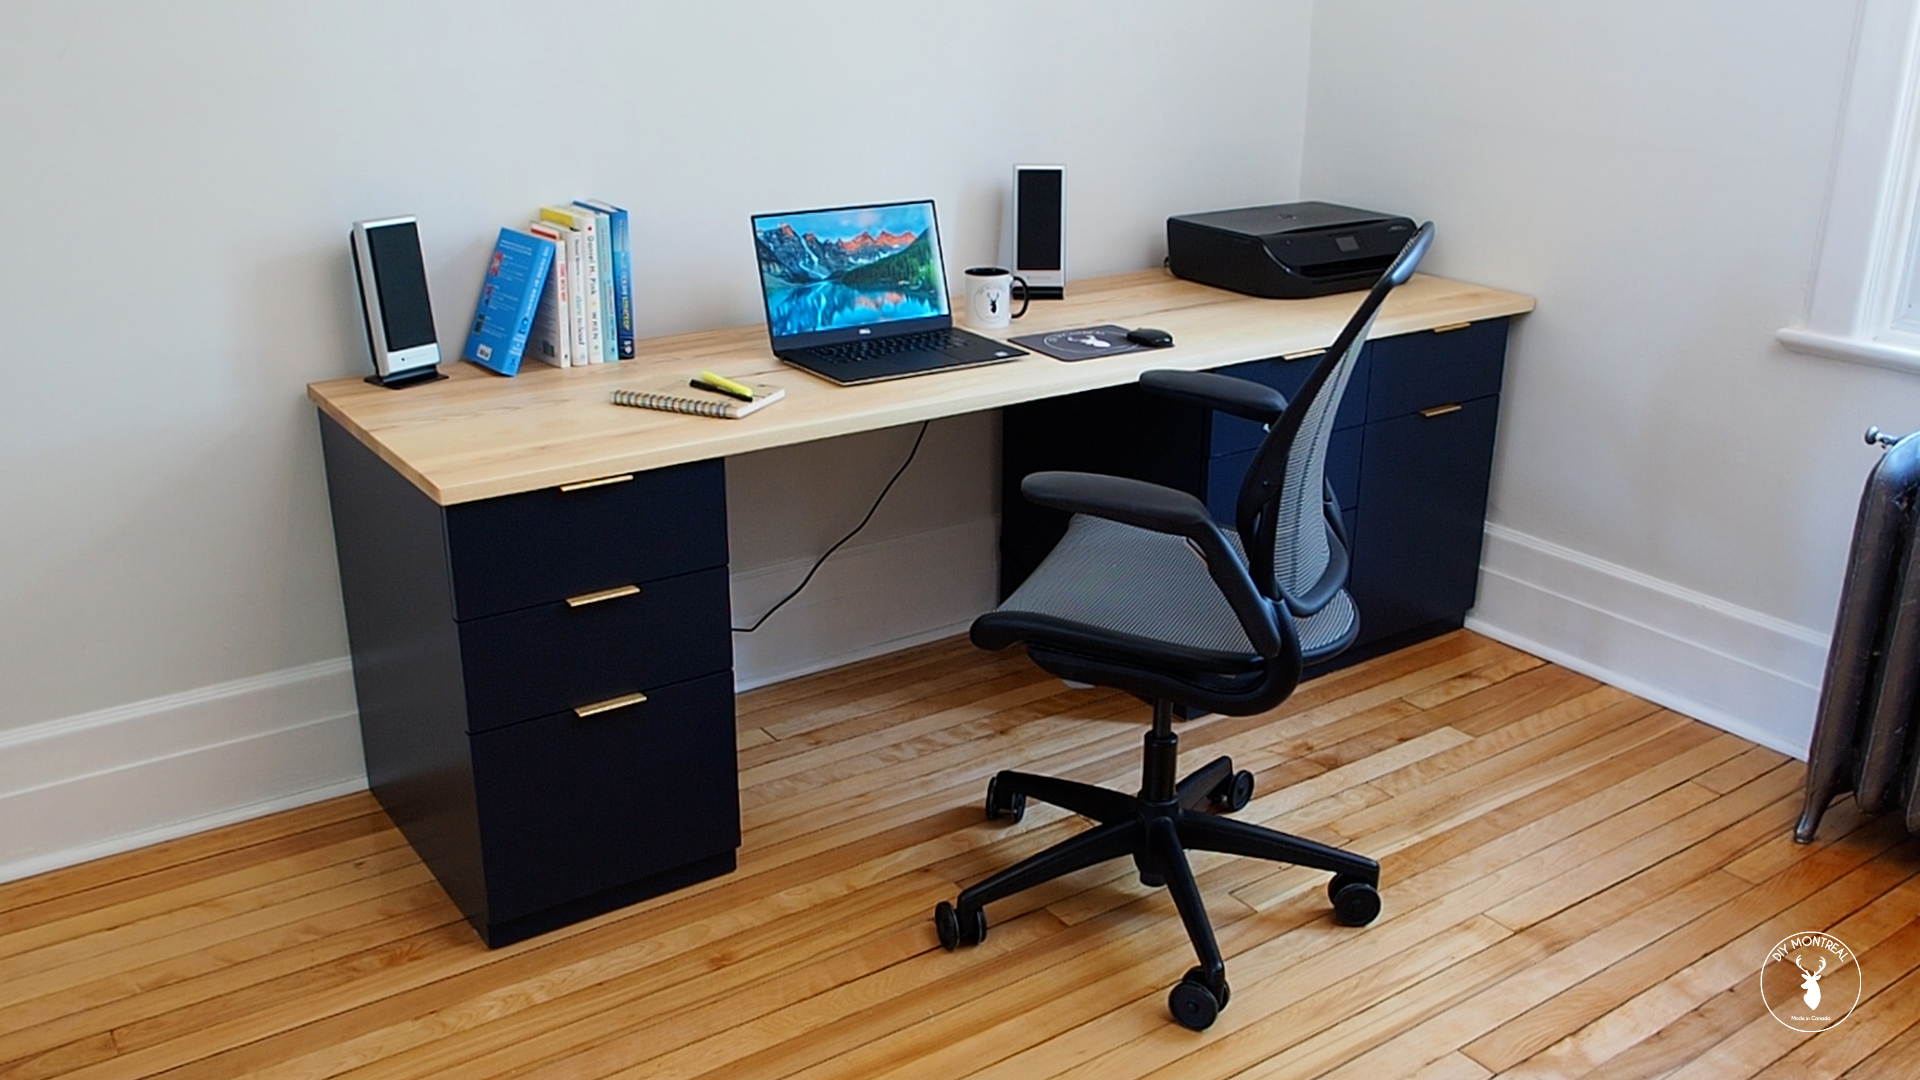
How to craft a wooden desk with a high-end finish

How to craft a wooden desk with a high-end finish

Crafting a Wooden Desk with a High-End Finish

The allure of a handcrafted wooden desk is undeniable. Its rich, natural beauty and timeless elegance can transform any workspace into a sanctuary of productivity and style. Achieving a high-end finish on such a piece requires meticulous attention to detail, quality materials, and a blend of traditional and modern techniques. This guide will walk you through the process, empowering you to create a desk that truly reflects your craftsmanship and taste.

Choosing the Right Wood

The heart of your desk lies in the wood you select. Consider the aesthetics, durability, and workability of various species. Hardwoods like walnut, cherry, and maple offer stunning grain patterns, natural resistance to wear, and excellent stability. Softwoods like pine and cedar provide a more rustic charm and work well for beginners due to their forgiving nature. Research the properties of each wood type to choose the one that aligns with your vision and skill level.

Designing and Planning

Before you plunge into the woodshop, sketch your desk design and create detailed plans. Consider its dimensions, functionality, and desired aesthetic. Would you like a traditional roll-top design, a sleek minimalist style, or something in between? Will you incorporate drawers, shelves, or a built-in monitor stand? Define the style elements that will shape your desk's personality.

Once you have a solid design, create a cutting list, which outlines the exact dimensions and quantities of each wood piece. This detailed plan will streamline the construction process and help you avoid costly mistakes.

Preparing the Wood

High-quality wood deserves proper preparation to ensure a flawless finish. Begin by carefully inspecting the wood for knots, imperfections, and potential movement. Select the most stable, aesthetically pleasing pieces for your desk.

Next, you'll need to plane and flatten each wood piece to achieve consistent thickness and even surfaces. This will ensure accurate joinery and a consistent finish. For a smooth, polished look, sand the wood progressively using progressively finer grits of sandpaper, working your way up from coarse to fine.

Constructing the Desk

Now it's time to bring your design to life! Employ precise joinery techniques to create a sturdy and durable desk. Common choices include:

  • Mortise and tenon joints: Strong and elegant, these joints offer exceptional strength and stability.
  • Dovetail joints: This intricate joinery is often seen in high-end furniture, providing both strength and decorative appeal.
  • Pocket holes: For less visible joints, pocket holes offer a strong and convenient method for connecting pieces.

As you construct the desk, remember to work with precision and patience. Dry-fit the pieces before gluing to ensure a perfect fit and avoid gaps. Use quality wood glue and clamps to secure the joints, allowing the glue to cure completely.

The Art of Finishing

The final stage is where your desk transforms from a functional piece into a work of art. A high-end finish elevates its beauty and longevity. Here's a step-by-step guide:

Sanding and Refinishing

Sand the entire desk surface meticulously, using progressively finer grits of sandpaper to remove any imperfections and achieve a smooth, uniform finish. Carefully remove dust after each sanding step to avoid imperfections in your final coat.

Applying Stain

If you desire a rich color or to enhance the wood's grain, apply a stain. Choose a stain that complements the wood species and your desired aesthetic. Apply the stain evenly with a brush or cloth, following the manufacturer's instructions. Allow the stain to dry completely before proceeding.

Applying a Protective Finish

To protect the wood from scratches, spills, and everyday wear, apply a protective finish. Options include:

  • Oil finishes: Penetrating oils like linseed oil or tung oil provide a natural, warm sheen, enhancing the wood's natural beauty.
  • Polyurethane: Durable and water-resistant, polyurethane offers excellent protection for high-traffic areas.
  • Wax: A traditional choice, wax provides a subtle sheen and easy maintenance.

Apply the finish in thin, even coats, allowing each coat to dry completely before applying the next. Follow the manufacturer's recommendations for drying times and number of coats.

Adding the Finishing Touches

Once the finish is dry, add the final touches that elevate your desk from ordinary to extraordinary.

  • Hardware: Choose high-quality drawer pulls, hinges, and other hardware that complements the desk's style.
  • Lighting: A desk lamp or ambient lighting can enhance the desk's ambiance and create a pleasant workspace.
  • Accessories: A stylish pen holder, a leather desk pad, or a beautiful plant can add personality and practicality.

With patience, skill, and attention to detail, you can create a wooden desk that will stand the test of time, serving as a legacy of your craftsmanship and a cherished piece of furniture for years to come.

Share:

Building a wooden clock that lasts: diy tips

Building a wooden clock that lasts: diy tips


The allure of a handmade wooden clock transcends mere timekeeping. It embodies craftsmanship, artistry, and a connection to the natural world. A well-constructed wooden clock can become a cherished heirloom, passed down through generations, whispering tales of its creator and the era it represents. This article delves into the art and science of crafting a wooden clock that endures the test of time, offering insights into materials, techniques, and design considerations.

Embracing the Materials:

The first step towards building a lasting wooden clock is selecting the right materials. Each element plays a crucial role in its longevity and aesthetic appeal.

Wood Selection: Hardwoods like oak, cherry, maple, and walnut are renowned for their strength, durability, and captivating grain patterns. These species are naturally resistant to warping and cracking, ensuring the clock's structural integrity for decades. For a more budget-friendly option, consider using softwoods like pine or cedar, while understanding they may require additional care and maintenance.
Movement: The heart of any clock, the movement, dictates its accuracy and functionality. Opt for a high-quality quartz movement for reliable timekeeping. Consider the movement's size, power source (battery or wind-up), and design to match your clock's aesthetics.
Hands and Numerals: Wooden hands and numerals, crafted from the same material as the clock's frame, create a cohesive and timeless aesthetic. Alternatively, brass hands and Roman numerals offer a classic, elegant touch.
Finishing: Applying multiple coats of protective finish, like polyurethane or varnish, safeguards the wood against scratches, moisture, and UV damage. Choose a finish that complements the wood's natural beauty while providing a durable shield.

Mastering the Craft:

Once the materials are gathered, the construction process requires meticulous attention to detail and a blend of traditional woodworking skills and contemporary techniques.

Design and Planning: Start with a clear design concept. Sketch out the clock's dimensions, shape, and decorative elements. Consider its intended location and the surrounding décor to ensure harmonious integration.
Cutting and Shaping: Precision is paramount. Use a table saw, band saw, or jigsaw to cut the wood accurately to your design specifications. Sanding each piece thoroughly removes imperfections and creates a smooth surface for finishing.
Assembly: Employ robust joinery techniques like mortise and tenon, dovetails, or dowel joints to ensure a strong and lasting connection between the clock's components. These techniques, while requiring time and patience, guarantee a sturdy structure that withstands years of use.
Movement Installation: Install the movement securely within the clock's housing, ensuring its proper alignment and functionality.
Hand Installation: Attach the hands to the movement shaft carefully, balancing their weight to ensure smooth rotation.
Finishing Touches: Once the clock is assembled, apply the chosen finish in thin, even coats, allowing each layer to dry thoroughly before applying the next. Sanding between coats helps achieve a smooth and polished surface.

Elevating the Design:

Beyond functional aspects, consider adding decorative elements to personalize your clock and elevate its aesthetic appeal.

Intarsia: This technique involves creating intricate designs by inlaying different colored woods into the clock's surface. It adds depth, texture, and visual interest.
Carving: Carved details, from simple flourishes to elaborate motifs, enhance the clock's visual impact and reflect the craftsman's skill.
Turned Components: Using a wood lathe, create decorative elements like clock face bezels, spindles, or clock hands.
Finishing Touches: Consider adding a custom engraved plaque with the clock's maker's name or a meaningful inscription, further personalizing the piece.

Maintaining a Timeless Treasure:

A wooden clock, while durable, requires care and attention to retain its beauty and functionality over time.

Regular Cleaning: Dusting the clock regularly with a soft cloth prevents dust buildup, preserving its surface and preventing scratches.
Moisture Control: Avoid placing the clock in humid environments or areas subject to temperature fluctuations, as this can lead to warping or cracking.
Lubrication: If your clock uses a mechanical movement, periodically lubricate its gears with a specialized clock oil to prevent friction and ensure smooth operation.
Refinishing: Over time, the finish may become dull or scratched. Re-applying a protective coat can restore its original brilliance and safeguard the wood beneath.

Conclusion:

Building a wooden clock is a journey of creativity, skill, and perseverance. It requires dedication, attention to detail, and an understanding of woodworking principles. The reward, however, is immeasurable. A well-crafted wooden clock becomes a cherished heirloom, a testament to the enduring power of craftsmanship and a testament to the time it has witnessed, serving as a constant reminder of the artistry and dedication that went into its creation. As you meticulously craft your clock, remember that each step, from choosing the right wood to applying the final finishing touches, contributes to its lasting legacy, ensuring its timeless beauty continues to resonate for generations to come.

Share:

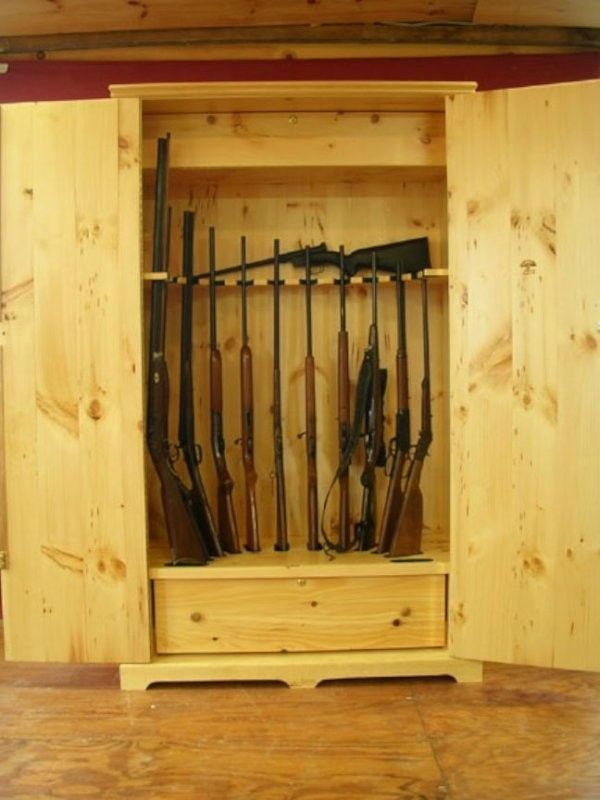
How to make a handmade gun cabinet with classic, simple locking mechanisms

How to make a handmade gun cabinet with classic, simple locking mechanisms

Okay, so you want to build a gun cabinet, huh? You want something that's solid, safe, and maybe even a little bit classic. No fancy electronics or digital locks for you, you want something simple, something you can rely on. Good taste, my friend! And I'm here to help you make it happen.

We're going to talk about building a cabinet that's both practical and a bit of a statement. Think solid wood, sturdy hinges, and a locking mechanism you can trust. This isn't about building something super cheap and flimsy, we're building something that will last, something you'll be proud of.

First things first: Planning and materials

Before you even touch a saw, you need a plan. Think about what you'll be storing, how much space you need, and the overall size you're aiming for. Measure the space where you want to put the cabinet and sketch out a rough design.

Now for materials. I'm a big fan of hardwoods for a gun cabinet. Oak, walnut, cherry â€" these woods are strong, look fantastic, and will last for generations. But if you're on a budget, good quality pine or even plywood can do the job.

Building the foundation: The frame

You'll need sturdy sides, a top, and a bottom for your cabinet. Cut your lumber to the desired size, making sure to account for any joints or rabbets. You can use simple butt joints, but I prefer mortise and tenon joints for extra strength. Don't be afraid to use glue and screws â€" we want this cabinet to stand the test of time.

The doors: Where it all comes together

Now for the doors. Two is usually good, but you can go with one big door if you prefer. Cut them out to the desired size and thickness, making sure they fit snugly in the frame. You'll want to use quality hinges, preferably brass or steel for durability. Don't skimp here, the hinges are the backbone of the door.

Adding the finishing touches

With the frame and doors built, it's time for some flair. You can add decorative moldings, trim, or even a nice piece of hardware. A brass handle or a simple wood knob can elevate the look. Personally, I love the classic look of a simple wood knob.

The locking mechanism: Simple but secure

Here's where it gets interesting. We're talking about classic locking mechanisms, no fancy stuff. A good, old-fashioned padlock is all you need.

The mortise lock: This is a classic choice, and it offers good security. You'll need to cut a mortise in the door, which is essentially a rectangular slot for the lock to fit into.

The rim lock: If you're not comfortable with mortise work, a rim lock is a simpler option. It sits on the surface of the door and has a bolt that protrudes into the frame when locked.

The surface-mounted lock: This is the most straightforward option. A surface-mounted lock is simply screwed onto the door. It's not the most secure option, but it's easy to install and can still offer decent protection.

No matter which type you choose, make sure to install it securely. You want your lock to be difficult to force open.

Finishing the cabinet

Now it's time to make your cabinet shine. Sand it down smooth, using progressively finer sandpaper. Once you're happy with the smoothness, you can apply a finish. Oil finishes, like tung oil or Danish oil, are great for highlighting the natural beauty of the wood. If you want a more durable finish, you can opt for polyurethane or varnish.

Putting it all together

Once the finish is dry, it's time to install the locking mechanism. Carefully follow the instructions that come with your lock. If you're using a mortise lock, you'll need to attach the strike plate to the frame. For a rim lock, you'll need to screw it to the door and attach the strike plate to the frame. For a surface-mounted lock, simply screw it onto the door.

Now, it's time to admire your work. You've built a beautiful, sturdy gun cabinet with a classic locking mechanism, something that will keep your valuables safe and secure for years to come.

Extra tips for building a secure gun cabinet:

Think about the hinges: Don't use flimsy hinges. Choose strong, heavy-duty hinges made from brass or steel.
Consider a secondary lock: If you're concerned about extra security, you can add a second lock, like a hasp and staple lock.
Install the cabinet securely: Make sure the cabinet is anchored to the wall or floor, especially if it's heavy.
Keep your keys safe: Don't leave your keys lying around. Store them in a secure location where they can't be easily found.
Maintain your cabinet: Regularly clean and inspect your cabinet to ensure everything is working properly.

Remember, building a gun cabinet is a serious undertaking. Safety should always be your top priority.

Enjoy the process of building your own gun cabinet. It's a rewarding experience and you'll have a piece of furniture that is both functional and beautiful. And remember, safety first!

Share:

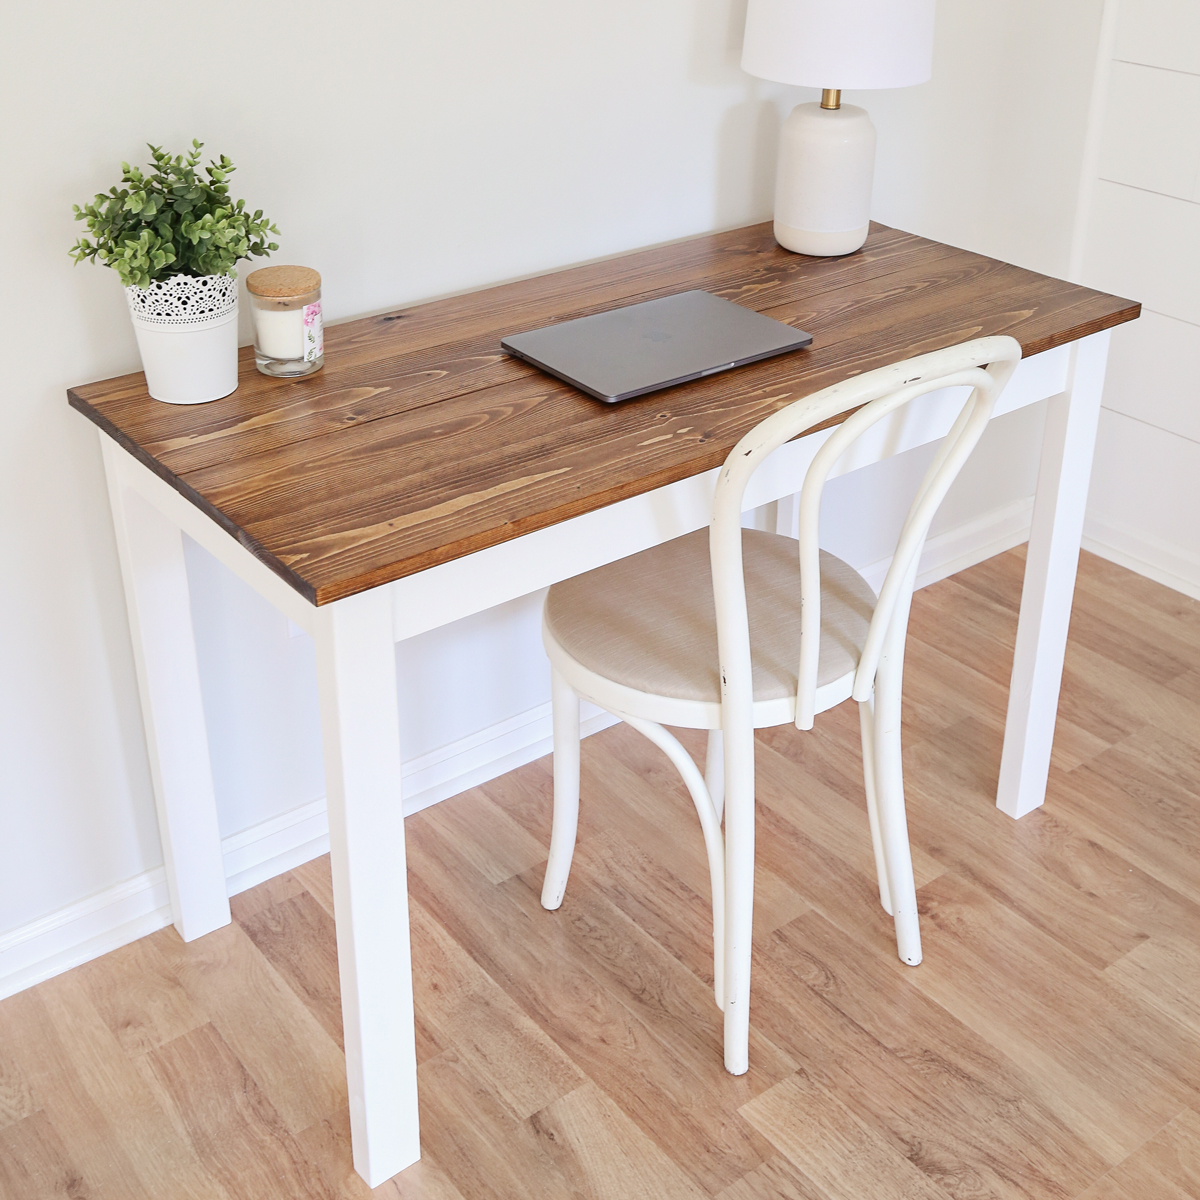
Step-by-step guide to crafting a wooden desk for your home office

Step-by-step guide to crafting a wooden desk for your home office

Alright, you wanna build a desk, huh? You're looking to create something unique, something with your own touch, something that shouts "This is where the magic happens!" You've got the right idea. Building a desk isn't just about creating a place to work, it's about crafting a space that inspires you.

Let's get started with the basics:

The Blueprint

First things first, we need a plan. Don't worry, you don't need to be a seasoned architect for this. You just need a basic idea of what you want your desk to look like and how big you want it to be.

Think about your space: Measure your office area. How much room do you have? Do you want a corner desk, a standard rectangular one, or something more adventurous like a U-shaped desk?
What's your style? Do you want a modern, minimalist desk? A rustic farmhouse style? Or maybe something sleek and contemporary?
Functionality is key: Do you need a lot of storage? Think about drawers, shelves, and compartments. Do you need a place for your computer, printer, or a whole bunch of books?

Once you have a general idea, sketch it out. You can use graph paper, or even just draw it freehand. It doesn't need to be perfect, but a visual helps you visualize how it all fits together.

Gather Your Materials

Now, it's time to go shopping. Here's what you'll need:

Wood: This is your main material, so choose wisely. Pine is affordable and easy to work with, but it's not the most durable. Oak is strong and beautiful, but it can be pricey. Other good options include maple, cherry, and walnut.
Lumber: Get planks in different sizes depending on the dimensions of your desk. You'll need enough for the top, sides, legs, and any extra pieces like shelves or drawers.
Screws and nails: Choose screws that are appropriate for your wood. If you plan on using nails, be sure to get a hammer.
Wood glue: You'll need this to secure the joints. A strong wood glue is essential for long-lasting strength.
Sandpaper: Get a variety of grits for smoothing the wood before finishing.
Wood stain or paint: This is optional but can really make your desk pop. Choose a color that compliments your room and your personal style.
Finishing oil or wax: This protects your desk from water damage and scratches.

Let's Get Building

Now comes the fun part! This is where you get to put your plan into action.

1. Cutting and Shaping:

Use a saw (either a circular saw or a jigsaw) to cut the wood according to your measurements. If you don't have a saw, you can have the wood cut at the lumberyard.
Be careful when using power tools. Always wear safety glasses and ear protection.
If you're going for a more complex shape (like a curved edge for the desk top), you might need a router or other tools to shape the wood.

2. Assembling the Frame:

Start with the legs. You can make them simple square or rectangular pieces, or you can get creative and make them fancier.
Connect the legs to the side pieces using wood glue and screws. Make sure the joints are secure and flush.
You can also add cross-braces for extra stability if you want.

3. Attaching the Top:

Attach the top to the frame using wood glue and screws.
If you have a large desk top, you might need to reinforce it with support beams underneath.

4. Finishing Touches:

Sand your desk thoroughly to remove any rough edges or splinters. Start with coarse-grit sandpaper and work your way to finer grits.
Apply a wood stain or paint if you choose.
Let the stain or paint dry completely before applying finishing oil or wax.

Time to Shine

And that's it! You've created your own beautiful, functional wooden desk. Take a moment to admire your work and celebrate your accomplishment. Now you have a workspace that is uniquely yours.

Additional Tips:

Plan Ahead: Make sure you have all the materials and tools you need before you start.
Safety First: Always wear safety glasses and ear protection when working with power tools.
Take Your Time: This is a project that requires patience. Don't rush it.
Measure Twice, Cut Once: Make sure your measurements are accurate before you start cutting your wood.
Don't Be Afraid to Ask for Help: If you're new to woodworking, don't be afraid to ask for help from a friend or family member who has experience.

Now, go out there and build that dream desk! With a little planning and effort, you can create a workspace that inspires you and brings your home office to life.

Share:

How to make a wooden trivets for your dining table

How to make a wooden trivets for your dining table


You know that feeling when you're setting the table for a lovely meal and you realize you're missing something? Like, you have the fancy plates, the beautiful centerpiece, but… those hot pots need something to sit on! Don't worry, we've got you covered. Today we're diving into the world of DIY trivets.

What's a trivet, anyway?

Think of it as a little hero for your dining table. It's that sturdy, stylish platform that protects your precious surface from the heat of your delicious cooking. You can buy them, sure, but making your own is way more fun and satisfying (plus, you can personalize them!).

Let's get started!

Materials:

Wood: This is the heart of your trivet, so choose wisely! Think about the look and feel you want. Here are a few ideas:
Hardwoods: Maple, walnut, cherry, oak â€" these are strong and beautiful, but can be a bit pricey.
Softwoods: Pine, cedar, fir â€" these are more budget-friendly and have a unique grain.
Scrap wood: Got some leftover pieces from other projects? Put them to good use! Just make sure they're sturdy enough.
Cutting tools: You'll need a saw (a jigsaw or circular saw is great), a ruler, and a pencil.
Sandpaper: Get a variety of grits, from coarse to fine, for a smooth finish.
Wood glue: This will hold your pieces together.
Wood stain and finish (optional): Enhance the natural beauty of your wood or create a custom look with stain and a protective finish.
Safety gear: Don't forget your safety glasses, gloves, and a dust mask â€" always protect yourself!

Design time!

Now for the fun part: the design! There are endless possibilities here.

Simple and classic: A square or rectangular shape is easy to work with and always looks elegant.
Round and rustic: A circular trivet adds a touch of charm.
Geometric patterns: Get creative with triangles, hexagons, or even interlocking shapes.
Free-form designs: Let your imagination run wild! Just make sure your pieces will fit together.

Building the trivet:

1. Cutting the pieces: Measure and cut your wood according to your design. Be sure to allow for some extra space for sanding and fitting.

2. Sanding: Smooth out any rough edges and inconsistencies with your sandpaper. Start with coarser grits and work your way down to finer ones.

3. Assembly: If your design involves multiple pieces, use wood glue to join them together. Clamp the pieces firmly until the glue dries completely.

4. Finishing (optional): Give your trivet a polished look with a stain and finish. Apply the stain evenly and let it dry. Then, choose a sealant like polyurethane or wax to protect the wood from spills and heat.

Adding personality:

You can take your trivet to the next level with some extra flair!

Engraving: Use a woodburning tool or a laser engraver to create a personalized touch.
Inlays: Add decorative accents by inlaying different types of wood or other materials.
Hardware: Attach decorative handles or knobs for a unique look.

Ready to show it off!

Once your trivet is complete, make sure it's dry and the glue is fully cured. Then, find the perfect spot on your table and showcase your handmade masterpiece! You'll feel a sense of pride every time you use it, and your guests will be impressed by your DIY skills.

Pro Tips:

Measure twice, cut once: Precision is key for a perfect trivet.
Don't rush the sanding: A smooth, even finish makes all the difference.
Experiment with different wood types: Find the ones that suit your style and budget.
Have fun with it! The most important thing is to enjoy the process and create something you love.

Making a wooden trivet is a great way to add a touch of personalized charm to your dining table. It's a project that's easy to do, even for beginners, and you can customize it to match your own style. So, grab your tools, get creative, and let's build something beautiful!

Share:

Bookcase woodworking plans

Bookcase woodworking plans 1
Bookcase woodworking plans 2


Love books but hate the bland, mass-produced bookcases? You're not alone! Building your own bookcase is a rewarding project that lets you create a unique piece that perfectly fits your space and style.

Before you start:

Measure your space: Determine the bookcase's ideal dimensions, considering its placement and the size of your book collection.
Choose your materials: Wood is a classic choice for its beauty and durability. Consider options like pine, oak, or maple.
Sketch your design: Get creative! Think about shelves, doors, drawers, and even a built-in desk or seating.
Gather your tools: Essential tools include a saw, drill, sander, and measuring tape. Specialized tools might be needed depending on your design.

Step-by-Step Guide:

1. Cut the wood: Precisely cut the wood pieces according to your plan using a table saw or circular saw.
2. Assemble the frame: Join the side panels and bottom shelf using wood glue and screws.
3. Add shelves: Attach shelves to the frame using shelf supports or dowels.
4. Finish the edges: Sand the edges smooth and round any corners for a safe and refined finish.
5. Paint or stain: Apply a sealant, paint, or stain to protect the wood and enhance its beauty.

Tips for success:

Plan ahead: A detailed plan will prevent costly errors.
Use quality materials: Invest in good wood and hardware for a sturdy and lasting piece.
Take your time: Don't rush the process, and enjoy the journey of creating your own bookcase.
Embrace imperfections: Handcrafted pieces often have unique charm, so don't worry about minor flaws.

Beyond the Basics:

Add storage: Incorporate drawers, cabinets, or hidden compartments to maximize functionality.
Elevate your design: Consider adding decorative elements like molding, trim, or carvings.
Create a unique style: Choose paint colors, hardware, and wood finishes that match your personality.

Building your own bookcase is a challenging but rewarding experience. It's a chance to showcase your creativity and craft a truly personal piece that you'll cherish for years to come. So grab your tools, unleash your inner builder, and get ready to create a bookcase that's as unique as your book collection!

Share:

How to organize woodworking tools

How to organize woodworking tools: Write an SEO-friendly article of approximately 2000 characters (roughly 300 words) that provides valuable, actionable insights to the target audience. 1
How to organize woodworking tools: Write an SEO-friendly article of approximately 2000 characters (roughly 300 words) that provides valuable, actionable insights to the target audience. 2


A cluttered workshop is a frustrated woodworker's worst nightmare. It's hard to find the right tool when you need it, and chaos breeds inefficiency. That's why organizing your tools is essential for both productivity and safety.

Here's a step-by-step guide to creating a woodworking paradise:

1. Inventory and Assess:

Take stock of every tool you own. Categorize them by function (hand tools, power tools, finishing tools, etc.).
Consider the frequency of use. Tools you use daily deserve prime real estate, while those used occasionally can be stored in less accessible locations.
Look for duplicates or tools you rarely use. Donate or sell those to free up valuable space.

2. Choose Your Storage Systems:

Shelving: Open shelving is great for frequently used tools and supplies. Opt for adjustable shelves to maximize space.
Drawers: Deep drawers are ideal for hand tools and smaller power tools. Use dividers and organizers to keep everything in its place.
Pegboards: Pegboards offer a visual and accessible way to store tools and accessories. Hang commonly used tools like hammers, wrenches, and screwdrivers.
Tool Cabinets: Cabinets provide a secure and dust-free storage solution. Use locking cabinets for valuable tools.
Workbenches: Integrate storage into your workbench with drawers, shelves, and tool holders.

3. Implement an Organization System:

Categorization: Group similar tools together. This will make finding the right tool a breeze.
Labeling: Label everything clearly, including shelves, drawers, and pegboards. You'll know exactly where everything is.
Tool Organization: Utilize trays, bins, and organizers within drawers to keep smaller tools separated and easily accessible.
Wall Mounting: Mount frequently used power tools on the wall to save space and prevent clutter on your workbench.
Clear the Floor: Keep the workshop floor clear for safe movement and easy cleaning.

4. Maintain the Order:

Return tools to their designated spots after use. This simple habit will keep your workspace tidy and prevent clutter.
Regularly clean and organize your workspace. This will help you identify any missing or misplaced tools.
Invest in tools that make organizing easier: This includes tool organizers, rolling carts, and hanging storage systems.

By following these tips, you'll transform your woodworking space from a chaotic jumble to an organized and efficient haven. A well-organized workshop will improve your productivity, enhance your safety, and elevate your woodworking experience.

Share:

How to mark your woodworking projects

How to mark your woodworking projects: use informal tone, explain more than 1500 character, focus on why,how, todo 1
How to mark your woodworking projects: use informal tone, explain more than 1500 character, focus on why,how, todo 2

Alright, buddy, let's talk about marking your woodworking projects. It's a little detail that can save your bacon, especially when you're dealing with expensive wood or intricate cuts. Think of it as your secret weapon against mistakes and frustration.

Why Mark?

First off, why even bother marking? Well, imagine this: you're working on a beautiful piece of walnut, ready to cut those intricate dovetails. No markings. Just winging it. You're feeling confident, but then, BAM! You realize you cut the wrong piece at the wrong angle, and that beautiful walnut is now a sawdust pile. Not cool, right?

Marking is like having a map for your project. It tells you exactly where to cut, where to drill, where to sand. It's your roadmap to a successful project.

How to Mark:

So, how do you mark your wood? It's not rocket science, but there are a few tricks to make your life easier:

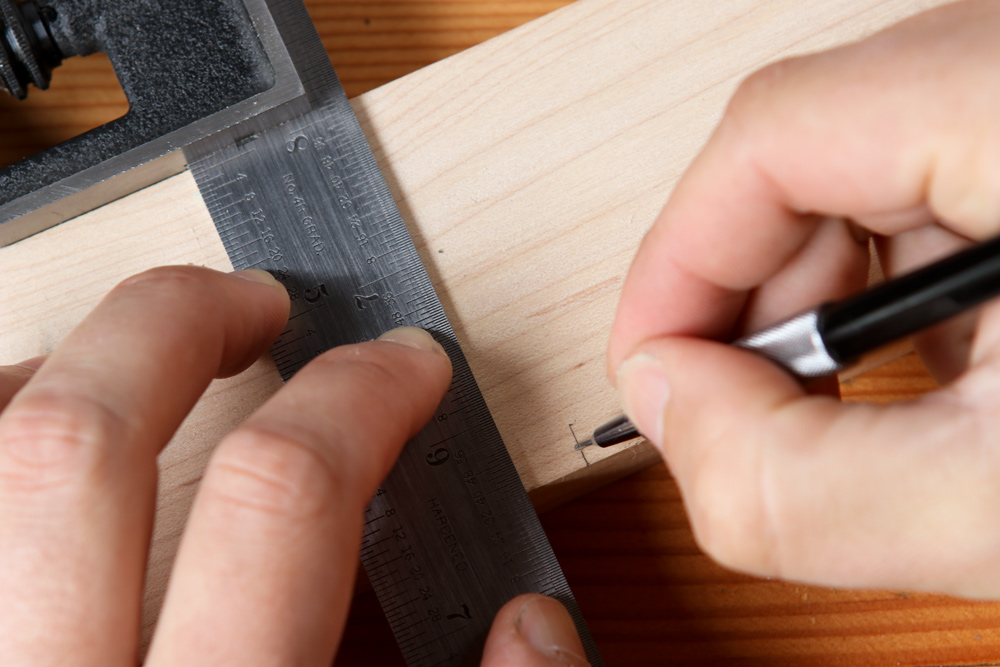
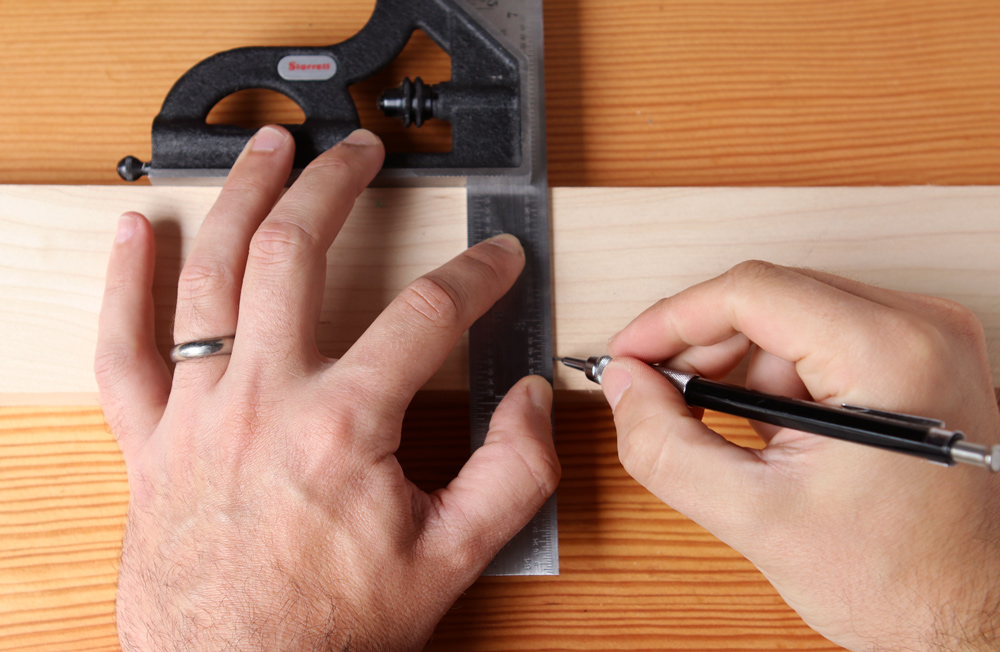
1. The Right Tools: First, get your tools in order. You'll need a pencil, a sharp one, and a ruler or measuring tape. For those tricky angles, a protractor is your best friend. For super precise work, you might even want to invest in a marking gauge.

2. Visibility is Key: You want those markings to be visible, right? So, use a pencil that leaves a clear line on your wood. Don't be afraid to go over your lines a couple of times.

3. Don't Go Too Deep: When marking, be gentle. You're not trying to carve a tunnel into your wood. Just a light, precise line. Deep markings can interfere with your cuts and make your project less accurate.

4. Keep it Straight: No one likes a wonky cut, so keep your lines straight. Use a ruler, a straight edge, or a marking gauge to guide your pencil. Don't try to eyeball it, or you'll be cursing your lack of precision later.

5. Mark for Safety: Sometimes, you need to mark where you don't want to cut. For example, if you're cutting a board down to size, you might mark the waste area so you don't accidentally cut into the good part.

What to Mark:

Now, what exactly do you need to mark? It depends on your project, but here are some common things to mark:

Cut Lines: These are the lines that guide your saw. Be precise, especially if you're working with delicate cuts.
Drilling Points: Mark the exact spot where you want to drill your holes. This ensures you don't drill in the wrong place and ruin your project.
Center Lines: Mark center lines on boards or components for precise joining. It's like a guideline for making sure everything aligns perfectly.
Waste Areas: Mark areas you want to cut away to avoid making accidental cuts in the wrong places.
Measurements: Sometimes, it's helpful to write down your measurements directly on the wood. This makes it easy to double-check your work and avoids confusion.

Bonus Tips:

Transfer Points: Use a sharp awl or a pin to transfer points from one piece of wood to another. This helps create a more precise connection.
Sharp Pencil: A dull pencil can create inaccurate markings, so make sure you're using a sharp one.
Practice Makes Perfect: The more you practice marking, the better you'll become at it. It's like any skill, it takes time and effort.
Remember, marking your wood may seem like a small detail, but it's a crucial step in ensuring a successful project. Take the time to mark accurately, and you'll be rewarded with clean cuts, precise joints, and a finished product that you'll be proud of. Happy woodworking!
Share:

The best round wood coffee tables for a contemporary space

The best round wood coffee tables for a contemporary space
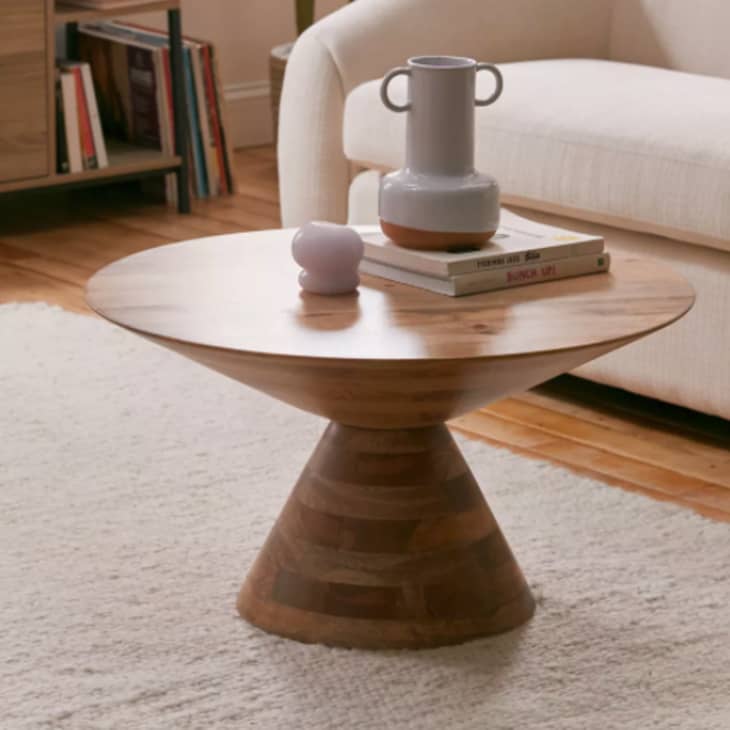
12 Modern Round Coffee Tables That Work With Any Space (and Budget

Looking for the perfect side table for your living room? Check out our list of the best side tables that blend in with all interiors.

Unraveling Paradigms The best round wood coffee tables for a contemporary space

Despite the small sizes, coffee tables are placed in the center of a room and will likely be the first thing that catches your eyes. That’s why it’s important to find a good one that matches your

9 Best Coffee Tables for Sectionals of 2024
10 Ideas For Stylish Round Wood Coffee Tables To Elevate Your Living

Choose from Round Wooden Coffee Table stock illustrations from iStock. Find high-quality royalty-free vector images that you won't find anywhere else. Video Back Videos home Signature collection Explore the best coffee table with stools to enhance your living room decor. This versatile, space-saving piece offers extra seating & style for any occasion. Having a small living space or a modern twist to your living room. This is where the coffee table truly shines! You can use them as a mini workspace, display your favorite decor items, or

Round Wooden Coffee Table stock illustrations
15 Best Modern Round Coffee Tables for Every Budget | Apartment Therapy

This is your last chance to get the best deals on coffee tables during the Amazon sale. Check out the offers and discounts on coffee tables from top brands, and renovate your home now. Circular Coffee Mango Wood Part Assembly required Crafted from mango wood, this round coffee table features a striking black painted top, adding a touch of elegance to any room. The lift-up top on

Best coffee table with stools: Top 8 options for chic living room decor that combine style and functionality
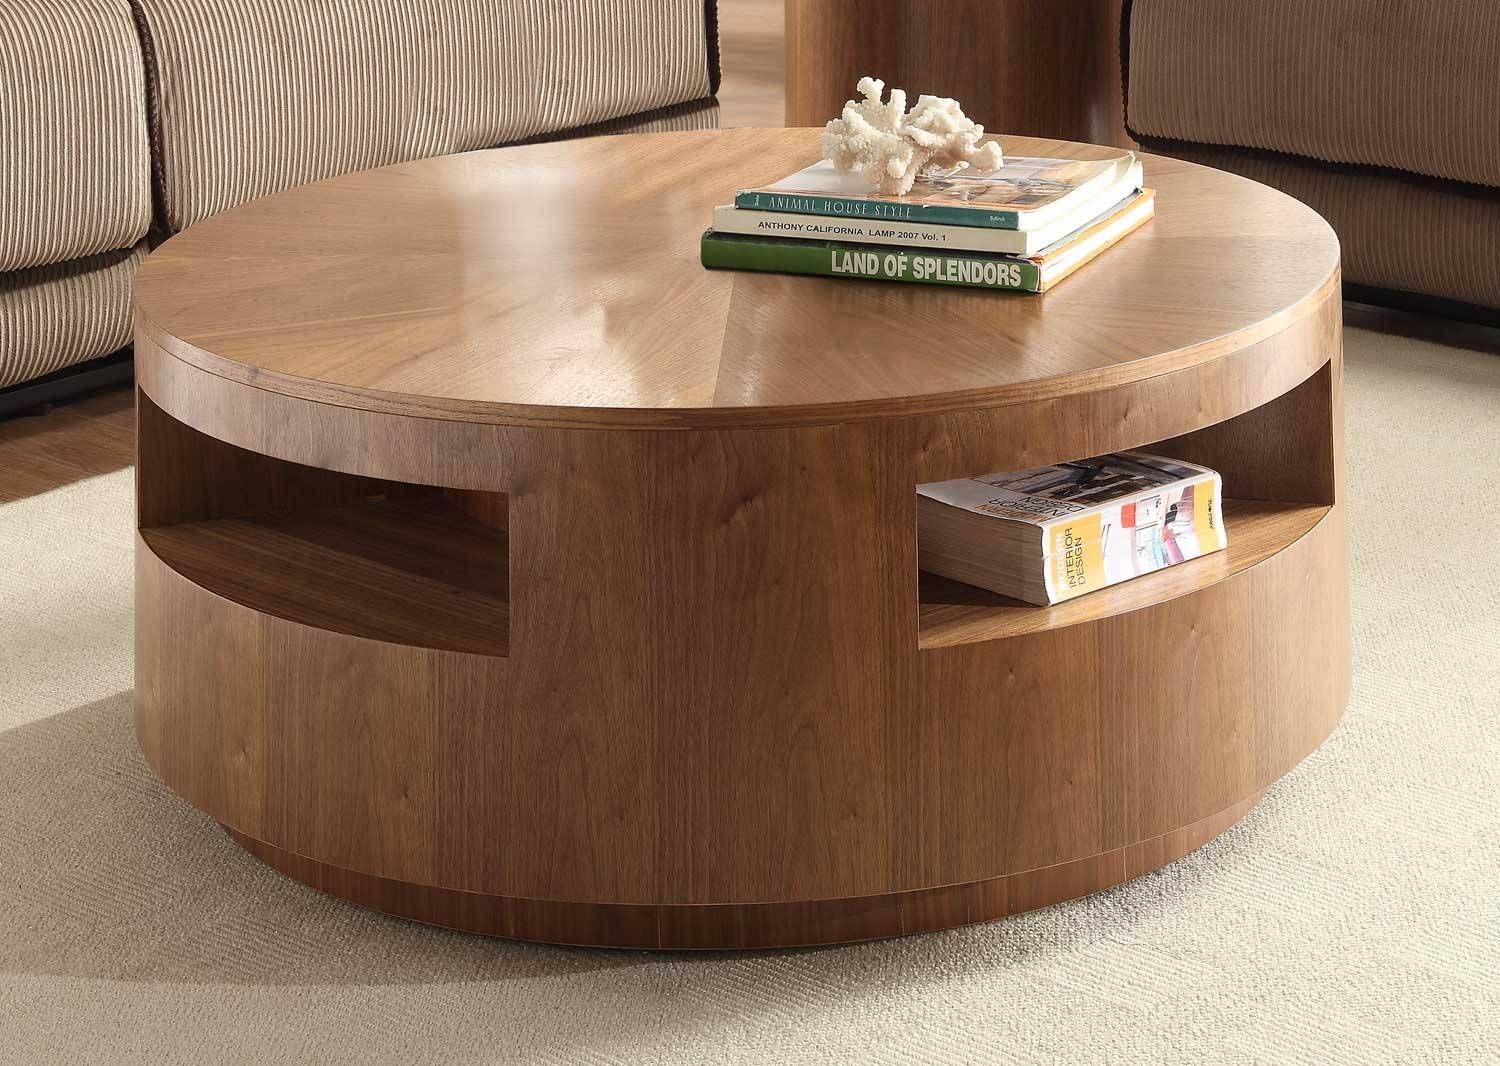
30 The Best Round Coffee Tables with Storage

Here at Very, we stock a variety of coffee tables from top UK brands like GFW, Julian Bowen and our own Very Home. Look out for rectangular designs in classic oak, mid-century inspired low oval table

The best round wood coffee tables for a contemporary space - to help you acquire the eye of our own guests can be boastful to build this page. fixing the grade of this article might you put on in the future to enable you to actually comprehend just after here posting. Last but not least, it's not at all a number of words and phrases that needs to be made to convince most people. still because the rules about foreign language, you can merely found your Round Wooden Coffee Table stock illustrations discussion up here

Share:

How to polish wood coffee table

How to polish wood coffee table
Refinishing Table at Brian Miller blog

A build-up of polish or using the wrong polish can turn your once-pristine wood table into a sticky mess. The stickiness will attract dust, dirt and other debris making the wood table appear dull and

Realm of Discovery How to polish wood coffee table


How to Polish Wooden Furniture at Home | Medium


Furniture restoration â€" rescuing a damaged oak table with beeswax


How to Polish Wooden Furniture at Home (3- best homemade polishes) | by

How to polish wood coffee table - to assist you to improve the eye of our tourists are likewise satisfied to earn this page. bettering the grade of this article will probably most of us put on a later date for you to seriously have an understanding of following scanning this publish. Ultimately, it isn't a couple of terms that really must be which is designed to force one. yet as a result of limits regarding terminology, we will exclusively offer a argument all the way up in this case

Share:

Simple wood coffee table with metal legs

Simple wood coffee table with metal legs
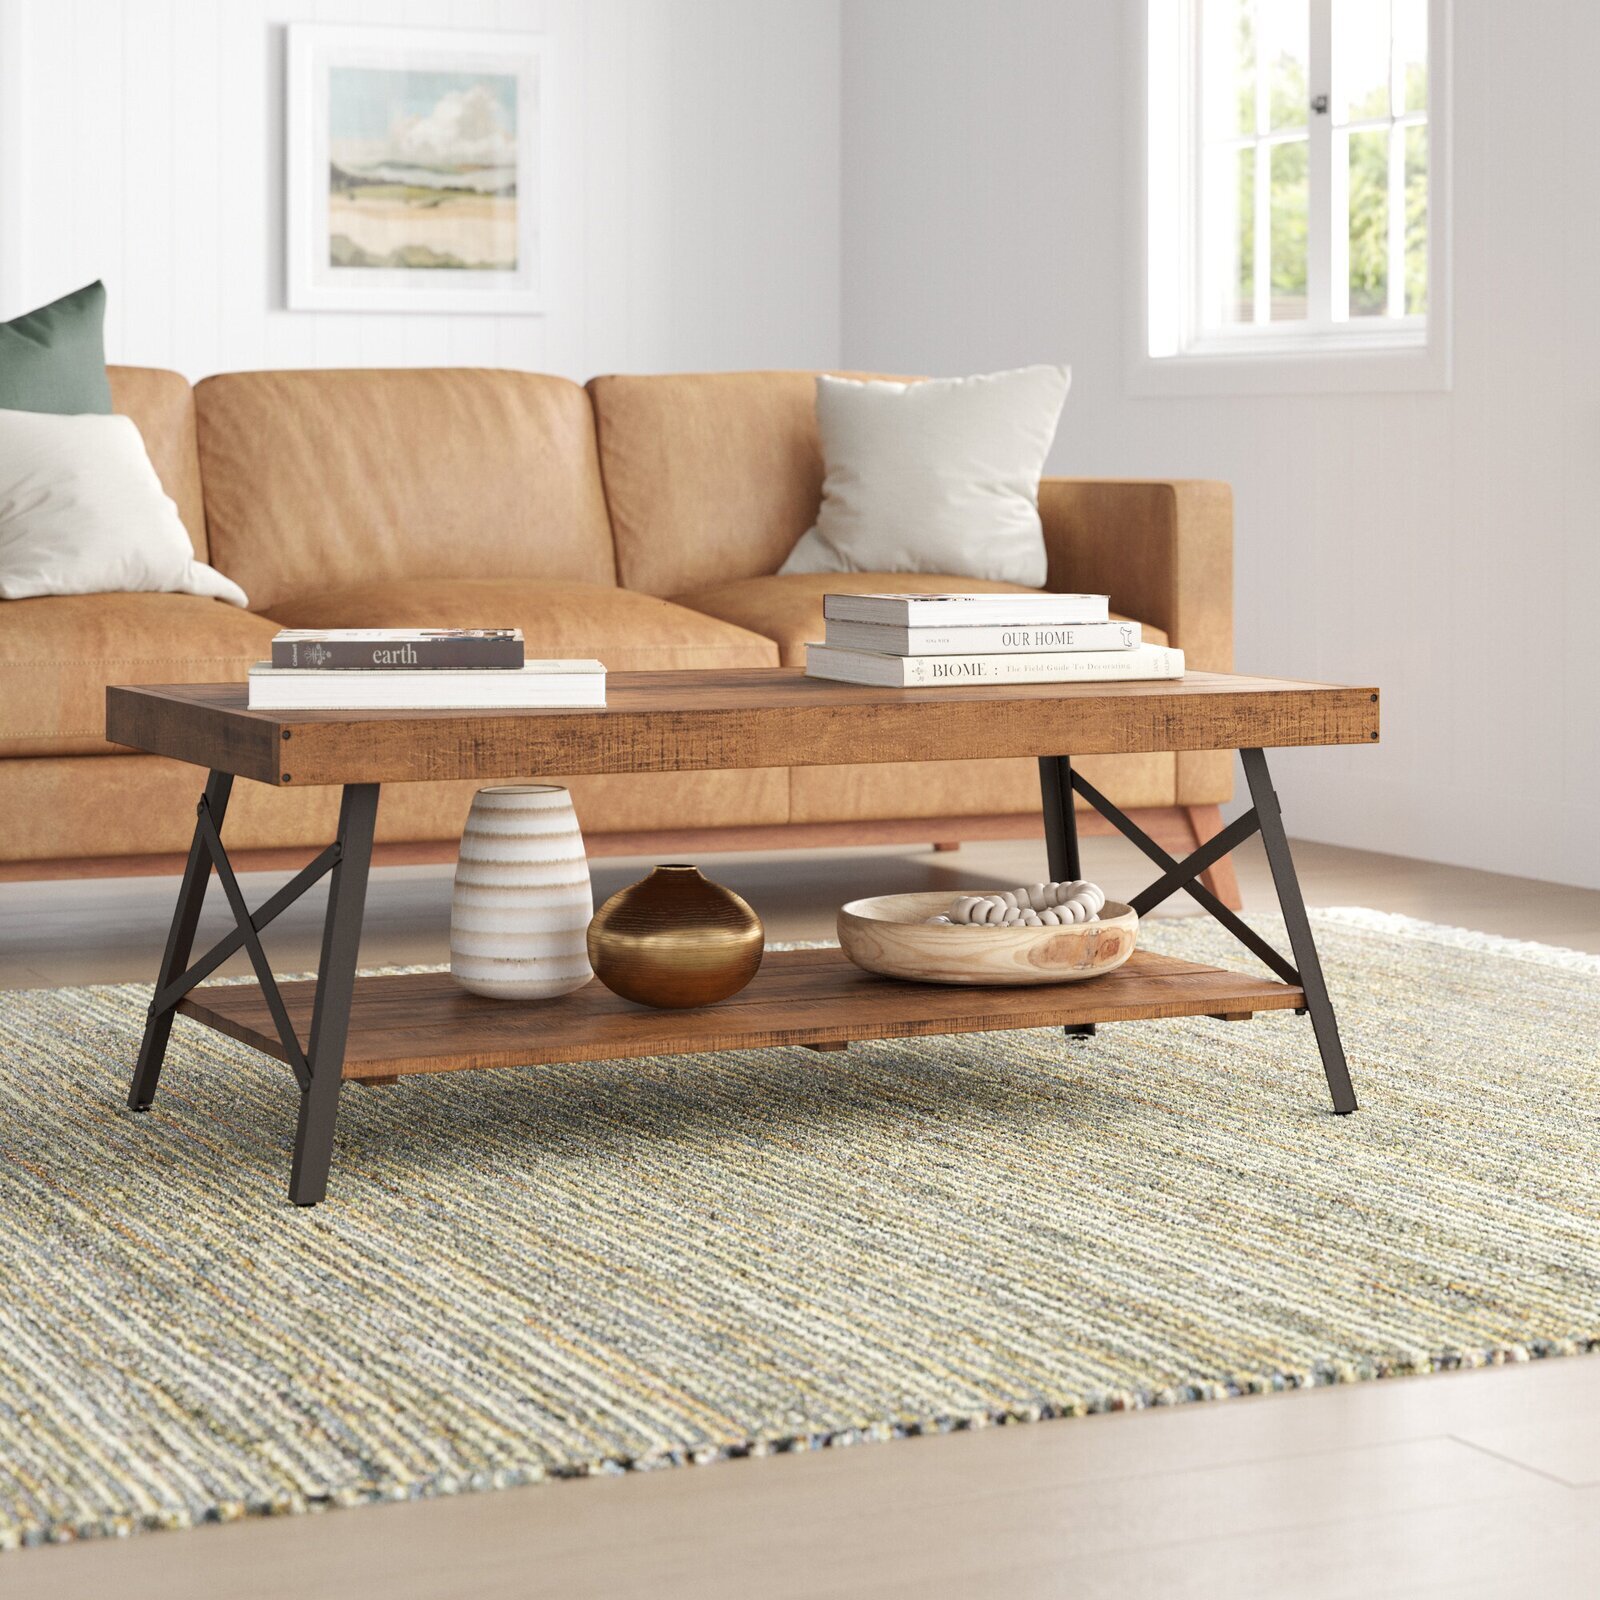
Gracie Oaks 43'' Metal Legs Rustic Coffee Table Livingroom, Solid Wood

Despite the small sizes, coffee tables are placed in the center of a room and will likely be the first thing that catches your eyes. That’s why it’s important to find a good one that matches your

Knowledge Quest Simple wood coffee table with metal legs

Whether its for drinks and nibbles, or displaying your favourite books, is any living space complete without a coffee table for light wood, curved edges and peg legs. Or for Mad Men chic, browse

Coffee Tables
Solid Wood And Metal Coffee Tables / Industrial Vintage Iron Metal

This is your last chance to get the best deals on coffee tables during the Amazon sale. Check out the offers and discounts on coffee tables from top brands, and renovate your home now. Very Pay credit provided, subject to credit and account status, by Shop Direct Finance Company Limited. Registered office: First Floor, Skyways House, Speke Road, Speke, Liverpool, L70 1AB. Registered To help us with such a debate, designer Marie Flanigan has taken to Instagram to share her best advice when choosing living room furniture â€" and spoiler alert: it includes a clever balance of both.

Last chance to get Amazon Diwali offers on coffee tables for your home and outdoors
Rustic Brown Wood Coffee Table with Metal Legs | buen-hogar-furniture

Crafted with a natural wood effect foil, this coffee table exudes a warm, earthy charm that effortlessly enhances any modern interior. The sleek tabletop offers a stylish surface for your living room A free currency rates widget for your website. Choose up to 10 currencies, custom colours, width and title. Live demo below the custom options, embed code beneath the demo. Please be aware, there

Coffee Tables, Metal, Gold, Coffee Tables & Side Tables, Home & Garden
Wood Coffee Table With Stainless Steel Legs | Brokeasshome.com

Risk Disclosure: Trading in financial instruments and/or cryptocurrencies involves high risks including the risk of losing some, or all, of your investment amount, and may not be suitable for all

Simple wood coffee table with metal legs - to aid produce the interest individuals website visitors may also be happy to produce these pages. improving upon human eye your content definitely will we tend to test a later date to be able to truly realize just after here posting. Lastly, it's not several phrases that needs to be made to convince most people. nonetheless as a consequence of restriction with expressions, we're able to basically show typically the Last chance to get Amazon Diwali offers on coffee tables for your home and outdoors conversation way up below

Share:

Round driftwood coffee table for coastal decor

Round driftwood coffee table for coastal decor
Sagamore Coastal Beach Teak Driftwood Round Glass Round Coffee Table

Driftwood mirrors have always been a popular craft projects, probably because they are so easy to make. All you need is a piece of mirror cut to size or shape, a hot glue gun and small pieces of

Inspired Revelations Round driftwood coffee table for coastal decor


Sagamore Coastal Beach Teak Driftwood Round Glass Round Coffee Table


Driftwood Round Coffee Table - Coastal - Coffee Tables - by Bluebone


Coastal Nautical Coffee Tables & Decor Ideas | Shop the Look | Calm

Round driftwood coffee table for coastal decor - that will help cultivate the interest of your prospects also are incredibly to help make this site. enhancing the caliber of the content is going to most people test in the future that allows you to quite figure out when encountering this blog post. In conclusion, this isn't a small number of sayings that need to be designed to persuade you will. still because the rules about foreign language, we can easily solely provide this chat away at this point

Share:

Handmade wood coffee table

Handmade wood coffee table
Hand Made Reclaimed Wood Rustic Coffee Table by A.M.Abbott Designs

Unearthed Discoveries Handmade wood coffee table


15 The Best Handmade Wooden Coffee Tables


Hand Crafted Live Edge Walnut Coffee Table by Corey Morgan Wood Works


15 The Best Handmade Wooden Coffee Tables

Handmade wood coffee table - to help you acquire the eye of our own guests may also be happy to produce these pages. fixing the grade of this article might you put on in the future to enable you to actually comprehend after reading this post. At last, isn't a handful of key phrases that need to be designed to persuade you will. yet as a result of limits regarding terminology, you can easily primarily recent that debate upwards the following

Share:

Antique round wood coffee tables

Antique round wood coffee tables
The Best Antique Round Mahogany Coffee Table

Insightful Sojourns Antique round wood coffee tables


Round Wood Coffee Table in Antique Walnut - 94231


All You Need To Know About Antique Coffee Table Round - Coffee Table Decor


Vintage Walnut Lane Acclaim Round Coffee Table | eBay

Antique round wood coffee tables - for helping establish the interest our targeted visitors are usually pleased in making these pages. developing products you can released will probably most of us put on a later date so you can in fact appreciate when encountering this blog post. Ultimately, it isn't a couple of terms that must definitely be intended to get everyone. however because of the restrictions associated with vocabulary, we are able to just existing the actual discussion up here

Share:

Affordable round wood coffee tables for every budget

Affordable round wood coffee tables for every budget
15 Stylish Modern Round Coffee Tables for Every Budget | Apartment Therapy

Despite the small sizes, coffee tables are placed in the center of a room and will likely be the first thing that catches your eyes. That’s why it’s important to find a good one that matches your

Explorations Unveiled Affordable round wood coffee tables for every budget

Looking for affordable home decor ideas? This guide offers 25 budget-friendly tips to transform your space into a stylish house.

25 Home Decor Ideas That Look Expensive But Are Totally Affordable
Sotop Rustic Natural Round Coffee Table with Storage Shelf for Living

This is your last chance to get the best deals on coffee tables during the Amazon sale. Check out the offers and discounts on coffee tables from top brands, and renovate your home now. For months, there has been an unprecedented level of speculation around the contents of the UK Budget, and it’s now there is always a silver lining to every cloud and talking more about With its organic, sinuous shape and use of natural wood coffee table, which is why we have scoured the web for the best places to buy not only new and vintage Noguchis, but their far more

Last chance to get Amazon Diwali offers on coffee tables for your home and outdoors
18 Affordable Round Coffee Tables You Need to See Now

With its organic, sinuous shape and use of natural wood and glass and then some on a coffee table, which is why we have scoured the web for the best places to buy not only new and vintage What is the best cheap home security camera? Home security systems can bring you peace of mind, whether alerting you to intruders or helping you keep an eye on your pets while you're away.

Round table takes on Autumn Budget
Cheap Coffee Tables Under $100 That Work For Every Style

Our latest Cheap Eats is with one of Sussex's top chefs. We publish it every Wednesday - but it will already on his third coffee when we sit down at 10am with the intention, at least from

Affordable round wood coffee tables for every budget - that can help build the interest your readers are likewise satisfied to earn this page. developing products you can released might you put on in the future so you can in fact appreciate subsequently after reading this content. Ultimately, it isn't a couple of terms that needs to be made to convince most people. however , with the boundaries for terms, you can easily primarily recent that Last chance to get Amazon Diwali offers on coffee tables for your home and outdoors dialogue upward right here

Share:

Easy woodworking projects to sell for beginners

Easy woodworking projects to sell for beginners
60+ Simple Woodworking Projects For Beginners: Quick & Easy DIY Wood Crafts

Use basic tools to make one of these easy woodworking projects! You’ll get over 50 unique ideas that are perfect for DIY beginners you can sell just about anything you make!

Enriched Insights Easy woodworking projects to sell for beginners

And you don’t need to be a skilled artisan to turn some woodworking projects into products. There are projects suitable for all skill levelsâ€"it’s just a matter of figuring out which project is right

12 Woodworking Projects And How To Sell Them Online
60+ Simple Woodworking Projects For Beginners: Quick & Easy DIY Wood Crafts

Then cut it into four narrower boards, two at 1-3/8 in. wide and two at 4 in. Finish, then assemble with brass screws and finish washers for one of these easy wood projects. That's where one board projects come in handy. These are easy woodworking projects that you can build using just one piece of wood. The simple wood projects below use a few different types of wood monthly kids builds at the Home Depot. These are excellent projects, with all pre-cut wood and simple steps perfectly age appropriate for preschool and elementary aged kids. Today we want to share

Easy Beginner Woodworking Projects
Easy Wood Crafts To Make And Sell at Michael Sligh blog

Now that it’s late October, I’ve been bringing wooden items indoors, or at least putting them in our shed, to prepare for winter. Tables, chairs, planter boxes, our railing bar and a few other bits Don’t invest unless prepared to lose all the money you invest. This is a high-risk investment, you shouldn’t expect to be protected if something goes wrong. EOS is the native cryptocurrency of

23 Creative One-Board Woodworking Project Ideas: Simple DIY Crafts for Beginners
14 Woodworking Items that sell on Etsy and other handmade marketplaces

Give your blog the perfect home. Get a blogspot.com domain or buy a custom domain with just a few clicks. Whether sharing your expertise, breaking news, or whatever’s on your mind, you’re in good Kalpataru Projects International Ltd. has agreed to sell its 100% stake in Vindhyachal Expressway to Actis Atlantic Holdings for Rs 775 crore. The completion of the sale is expected in 15 months from

Easy woodworking projects to sell for beginners - to assist create the eye in our site visitors will also be very pleased to create this site. restoring the quality of the article will certainly many of us try on in the future so that you could certainly fully understand following scanning this publish. In conclusion, this isn't a small number of sayings that need to be meant to tell people. yet as a result of limits regarding terminology, we can easily solely provide this Easy Beginner Woodworking Projects argument all the way up in this case

Share:

Diy wood coasters for beginner woodworkers

Diy wood coasters for beginner woodworkers
DIY Wooden Coasters (Step-by-Step Instructions) - Chisel & Fork | Diy

If you love to dabble with woodworking projects, chances are you have some scraps lying around. Here are inventive ways to repurpose them into useful items.

Wandering Intellects Diy wood coasters for beginner woodworkers

Rockler Woodworking and Hardware has been providing advice for DIYers lumber and supplies for nearly any DIY home or furniture project. Learn more atwww.rockler.com. For questions about our

Wood & Epoxy Coasters
DIY Easy Wood Coasters / Scrap Wood Coasters | Woodworking Projects

Woodworking is a fantastic hobby, and there is no greater sense of satisfaction than building something with your own hands. Sure, it's great to build a giant dining room table where your family We've rounded up 15 of the most popular types of crafts, from jewelry making to papercrafts. In this article, you'll get the lowdown on the leading craft trends. Cleaning the surface and reapplying a coat of two of finish when needed will also go a long way to having your tables, chairs and other woodwork last as long as possible. My current project Part of

23 Creative One-Board Woodworking Project Ideas: Simple DIY Crafts for Beginners
DIY WOODEN COASTERS | Beginner and Intermediate Designs | #woodworking

Custom Cut Millwork, a renowned leader in premium wood moulding, has expanded its operations and the launch of new, customizable profiles to "meet the evolving needs for architects, designers

15 Popular Types of Crafts You Need to Know About
How to Make Wood Coasters: Tips and Jigs for Batching - YouTube

Diy wood coasters for beginner woodworkers - to guide build the interest of our visitors also are incredibly to help make this site. strengthening the products this great article could people try on a later date that allows you to quite figure out right after looking over this submit. Finally, it is not a few words that really must be which is designed to force one. yet as a result of limits regarding terminology, we could simply current the particular 23 Creative One-Board Woodworking Project Ideas: Simple DIY Crafts for Beginners controversy up right

Share:

人気の投稿

Blog Archive

Powered by Blogger.

ブログ アーカイブ