
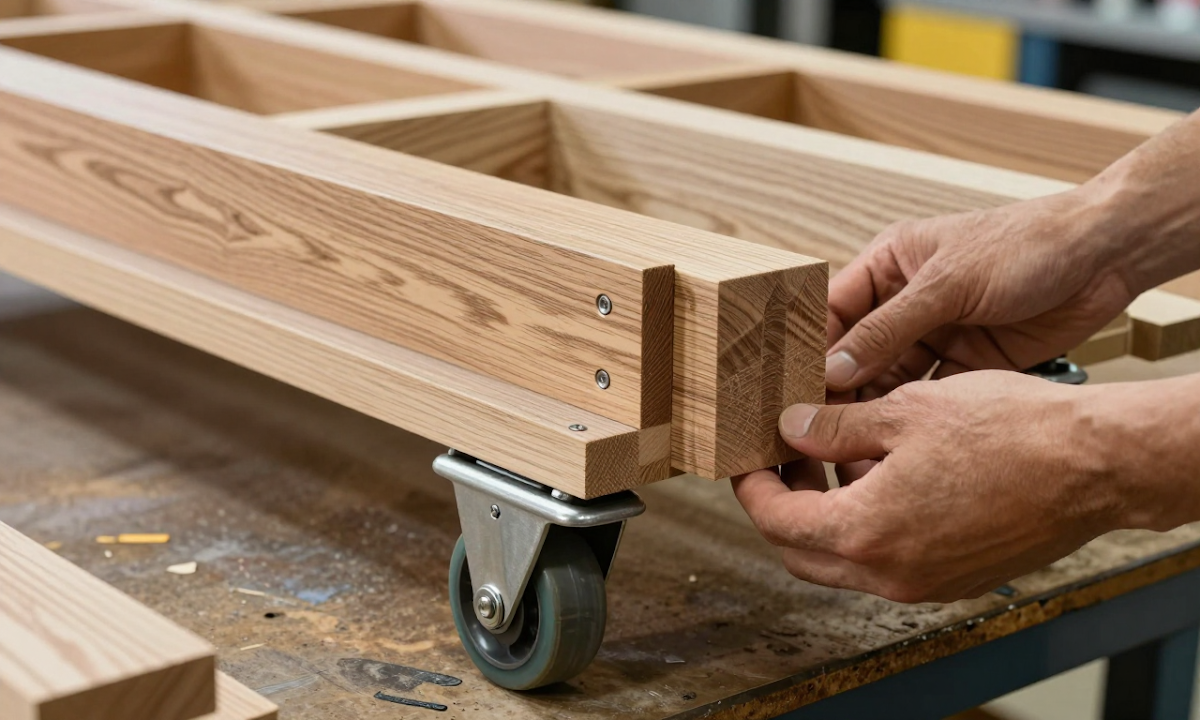
You have likely spent hours searching for a comfortable spot to rest your feet while watching television, only to realize the space is cluttered with scattered items and difficult to clean around. Building a rolling ottoman cart solves this problem by combining seating comfort with practical storage that moves wherever you need it. This project demonstrates how to construct a sturdy piece using simple joinery techniques that require no advanced machinery or expensive tools.
By the end of this guide, you will understand how to select durable wood for reinforced shelf construction and install an adjustable caster setup that ensures smooth movement across your floor. You will also learn specific methods for creating a removable tray design with hidden fasteners, allowing guests easy access while keeping the interior organized. These skills transform basic lumber into a functional furniture piece that enhances your living room or home office.
In this article:
- Choosing The Right Wood And Caster Types For Mobility
- Designing Removable Trays With Hidden Fasteners
- Constructing Reinforced Shelves To Support Heavy Loads
- Installing Adjustable Casters For Smooth Movement And Height Control
- Final Assembly And Testing The Rolling Mechanism
- Final Thoughts
Choosing The Right Wood And Caster Types For Mobility
Building a durable cart begins with selecting materials that balance strength, weight, and workability. For the frame and tray bases, hardwoods like oak or maple provide excellent resistance to wear and tear without being excessively heavy. These dense woods ensure the structure remains stable even when stacked with books or kitchen items. Softwoods such as pine are lighter but more prone to dents; they require thicker stock to achieve similar strength to a thinner piece of hardwood.
Selecting Durable Hardwood Options
Oak is an ideal choice because it offers high rigidity and takes stains well, making it suitable for both indoor and protected outdoor use. Maple provides a lighter color and very hard surface that resists scratches from dropped utensils or toys. Walnut adds a premium aesthetic with rich grain patterns but costs significantly more than standard construction woods. Plywood made from birch or maple is also excellent for shelf surfaces because its layered structure prevents warping under uneven loads, unlike solid lumber which might twist over time.
Caster Wheel Load Ratings And Materials
The wheels must support the total weight of the cart plus any contents without collapsing. Look for casters rated at least 100 pounds each if you plan to carry heavy cookware or stacks of books. Plastic or nylon wheels are quiet and inexpensive but may crack under extreme stress; rubber tires offer superior cushioning and grip on hardwood floors, preventing scratches during movement.
Adjustable caster setups allow for leveling the unit on uneven surfaces like garage concrete or patio slabs. Ensure the swivel mechanism locks securely so the cart does not roll unintentionally when stationary. For smooth operation, choose wheels with sealed bearings to protect against dust and moisture in busy workshops or kitchens. Always verify that the combined load rating of all four casters exceeds your intended maximum weight by at least 20% for long-term reliability.
Designing Removable Trays With Hidden Fasteners
Designing removable trays requires precise planning to ensure they slide out freely without compromising structural integrity. Start by measuring the inner dimensions of your main frame, subtracting 1/8 inch (3 mm) from both width and depth to account for wood swelling and friction. This slight clearance allows the tray to glide smoothly while keeping it securely seated when pushed back in.
Choosing The Fastening Method
Hidden fasteners keep the look clean by concealing screws underneath the top surface of the tray or within the frame rails. Use small flat-head wood screws driven into pre-drilled holes on the underside of the tray, positioned near the corners but not directly under the edge where feet might rest. This method prevents accidental snagging when pulling the tray out for cleaning.
- Pocket Holes - Drill angled holes from the top frame down into the tray using a pocket hole jig; this hides screws inside the joint while providing strong mechanical retention.
- Dowels - Insert glued wooden dowels through matching holes in both the frame and tray to lock them together without visible hardware.
- Biscuit Joinery - Use flat biscuits cut into slots on mating surfaces to align parts easily during assembly while adding modest holding power.
Avoid relying solely on friction, as vibrations from rolling can cause trays to loosen over time. A combination of PVA glue and mechanical fasteners ensures the tray stays attached until you intentionally remove it. For beginners without specialized jigs, pocket screws remain the most accessible option for creating strong yet invisible connections.
Ensuring Smooth Removal
Consider adding a slight bevel to the bottom edge of the tray or cutting a small groove in the frame rail to prevent binding. These subtle design tweaks reduce resistance when sliding trays in and out, especially if using thicker hardwoods that naturally expand with humidity changes.
Test your fit by pushing the tray fully into place before attaching any finish coats. Once painted or stained, wood expands slightly, which can make removal difficult later on. Always leave a consistent gap around all four sides to maintain uniform movement regardless of environmental conditions.
Constructing Reinforced Shelves To Support Heavy Loads
Building a sturdy interior for your rolling ottoman cart requires more than just stacking boards. You must create a framework that distributes weight evenly across the frame to prevent sagging over time. This internal support system acts like the ribs in a human body, providing necessary stiffness without adding excessive bulk.
Lay Out The Shelf Structure
Start by marking your shelf dimensions on scrap wood before cutting any final pieces. For a standard 24 inch (610 mm) wide cart, you typically need two main supports spaced about 15 inches (380 mm) apart to handle moderate loads effectively. Use a straight edge or chalk line to ensure your marks are perfectly parallel so the shelf sits flat once assembled.
Select Appropriate Lumber
Choose hardwoods like maple or walnut for visible edges, but use softer, cheaper lumber like pine or poplar for internal cross-bracing. The internal bracing does not need to be as thick as the top surface; 1/2 inch (12 mm) stock is usually sufficient if properly positioned. This saves money while maintaining structural integrity because the hardwood skins handle most of the bending stress.
Add Cross-Bracing
Cut cross-braces to span the distance between your outer frame rails and place them directly under where the tray will sit. These pieces transfer weight from the center of the shelf down to the main legs or side frames. For a heavy-duty build, consider adding diagonal bracing in addition to the horizontal supports to lock the structure against twisting forces.
Secure With Strong Fasteners
Use wood screws with washers or specialized shelf pins to attach these internal members securely. Pre-drilling pilot holes is essential when working near edges to prevent splitting, especially if you are using hardwoods like oak. Ensure all fasteners go deep enough to grip the frame rails firmly without passing through the other side.
Sand Before Gluing
Always sand your internal supports smooth before applying glue and clamping them into place. Rough surfaces can trap air bubbles in the adhesive, creating weak spots that might fail under stress. Wipe away excess glue immediately with a damp cloth to avoid messy squeezes that could ruin the finish later.
Test For Flex
Apply downward pressure at the center of your shelf before finalizing the assembly to check for any flex or movement. If you feel significant bounce, reinforce the area by adding another cross-brace closer to the load point. A rigid foundation ensures that when you place heavy books or dishes on your rolling ottoman cart, it remains stable and safe.
Following these steps creates a robust base capable of handling daily use without compromising the mobility or design of your furniture piece.
Installing Adjustable Casters For Smooth Movement And Height Control
Begin by marking precise locations for each caster on the underside of the bottom shelf, ensuring equal spacing from all corners to maintain balance.
- Drill Pilot Holes - Use a drill bit slightly smaller than your screw diameter to prevent wood splitting when driving fasteners.
- Align Screws - Insert screws through the caster cups or mounting plates into the pilot holes, being careful not to overtighten and strip the threads.
- Torque Control - Tighten bolts just enough so the caster rotates freely without wobbling, as excessive force can distort softwoods like pine.
If your design uses concealed fasteners for a clean look, countersink the holes slightly below the wood surface before inserting screws.
Leveling And Alignment
Uneven floors are common in homes and offices, so an adjustable caster setup is essential for keeping the ottoman stable.
- Initial Check - Place a small spirit level on top of the frame to identify which legs need raising before final tightening.
- Adjust Height - Most swivel casters have an eccentric base with multiple holes; rotate or unscrew the mounting plate to raise or lower each wheel individually.
- Re-tighten - Once all wheels touch the ground evenly, tighten every bolt securely while checking that the frame remains square.
This step prevents dragging and ensures smooth rolling even on sloped surfaces.
Testing Movement And Stability
After installation, test each caster by lifting slightly off the floor to confirm free rotation without binding or excessive play.
- Load Test - Place a moderate weight like a book or small box on the tray and roll it back and forth to check for wobbles.
- Swivel Action - Gently push the ottoman in different directions to ensure the swivel mechanism responds smoothly without resistance.
- Grip Adjustment - If wheels slip too easily on hardwood or tile, consider adding a rubberized pad under each caster for better traction.
Always keep the workpiece supported while making adjustments to avoid accidental drops or injuries. Use clamps if needed to hold heavy pieces steady during final tightening steps.
Final Assembly And Testing The Rolling Mechanism
Once all joints are dry, use clamps to apply consistent pressure across every connection point before setting the project down. This ensures the structure remains rigid without relying on friction alone to hold heavy loads in place. Verify that no boards have shifted by running a hand along seams and checking for gaps larger than a business card.
Testing The Rolling Mechanism
Place the completed cart on your floor surface and apply downward pressure while attempting to push it forward and backward. Listen for any clicking or grinding sounds that indicate casters are not seated correctly in their mounting holes. If movement feels stiff, inspect the caster stems to ensure they do not bind against the bottom of the shelf frame.
- Check Caster Alignment - Ensure each wheel sits flat on the ground and does not wobble when weight is applied.
- Verify Tray Stability - Place a removable tray on top and roll the unit to confirm it stays level during transit.
- Test Height Adjustment - If your caster setup includes locking wheels, engage and disengage them to ensure smooth transition between rolling and stationary modes.
A smooth operation requires that the frame is perfectly square before testing. Even a slight twist in the bottom shelf can cause casters to drag or catch on floor imperfections. Use a carpenter's square at each corner of the base to confirm right angles after assembly. Adjust any loose screws if you notice uneven rolling behavior.
Final Stability Inspection
Apply significant weight to the top surface, such as placing several books or a heavy bag, and attempt to roll the unit again. This simulates real-world usage where the cart must support substantial items without tipping or wobbling excessively. Confirm that the reinforced shelf construction distributes this load evenly across all four caster contact points.
If the cart feels unstable under load, check whether the cross-bracing is tight and aligned with the frame edges. Loose internal supports can cause flexing that compromises mobility and safety during transport. Make necessary adjustments while the project is still assembled to avoid disassembly later.
Final Thoughts
Success with your rolling ottoman cart depends on selecting durable wood for stability and choosing casters that balance mobility with load capacity.
Material And Hardware Selection
- Prioritize hardwoods or thick plywood to prevent sagging under heavy items like books or laptops.
- Select swivel casters with locking mechanisms if the cart needs to stay stationary when in use.
Hiding fasteners and reinforcing shelf edges ensure a clean look while maintaining structural integrity over time. Careful assembly of these components creates a functional piece that moves smoothly without compromising strength. A well-built rolling ottoman cart serves as a practical addition to any room layout.


No comments:
Post a Comment