Build a Stunning Mirror with These Woodworking Plans

Craft a Show-Stopping Mirror: Detailed Woodworking Plans

Transform a simple mirror into a breathtaking piece of art with these comprehensive woodworking plans. This project allows you to showcase your craftsmanship while adding a unique, personalized touch to your home décor. Whether you're a seasoned woodworker or a curious beginner, these detailed instructions guide you through each step, from selecting the perfect wood to achieving a flawless finish. Prepare to be amazed by the stunning results!

Choosing Your Materials: The Foundation of Beauty

The success of your mirror hinges on selecting high-quality materials. Start by choosing your wood. Hardwoods like walnut, mahogany, or cherry offer superior durability and an exquisite grain that will enhance the mirror's aesthetic appeal. Consider the overall style you envision – a rustic, minimalist, or ornate design will influence your wood selection. Beyond the wood, you'll need a mirror of your desired size and shape. Ensure it's securely backed to prevent accidental breakage. You'll also require wood glue, wood screws, sandpaper (various grits), wood stain or paint (optional), varnish or polyurethane (for protection), and finishing supplies.

Essential Tools for the Project

Gather your woodworking tools before you begin. A well-stocked workshop is crucial for a successful project. You'll need:

  • Measuring tape and pencil
  • Circular saw or miter saw for precise cuts
  • Wood clamps to secure pieces during assembly
  • Drill with various drill bits
  • Sanding block or power sander
  • Safety glasses and dust mask

Remember, safety is paramount. Always wear appropriate safety gear throughout the project.

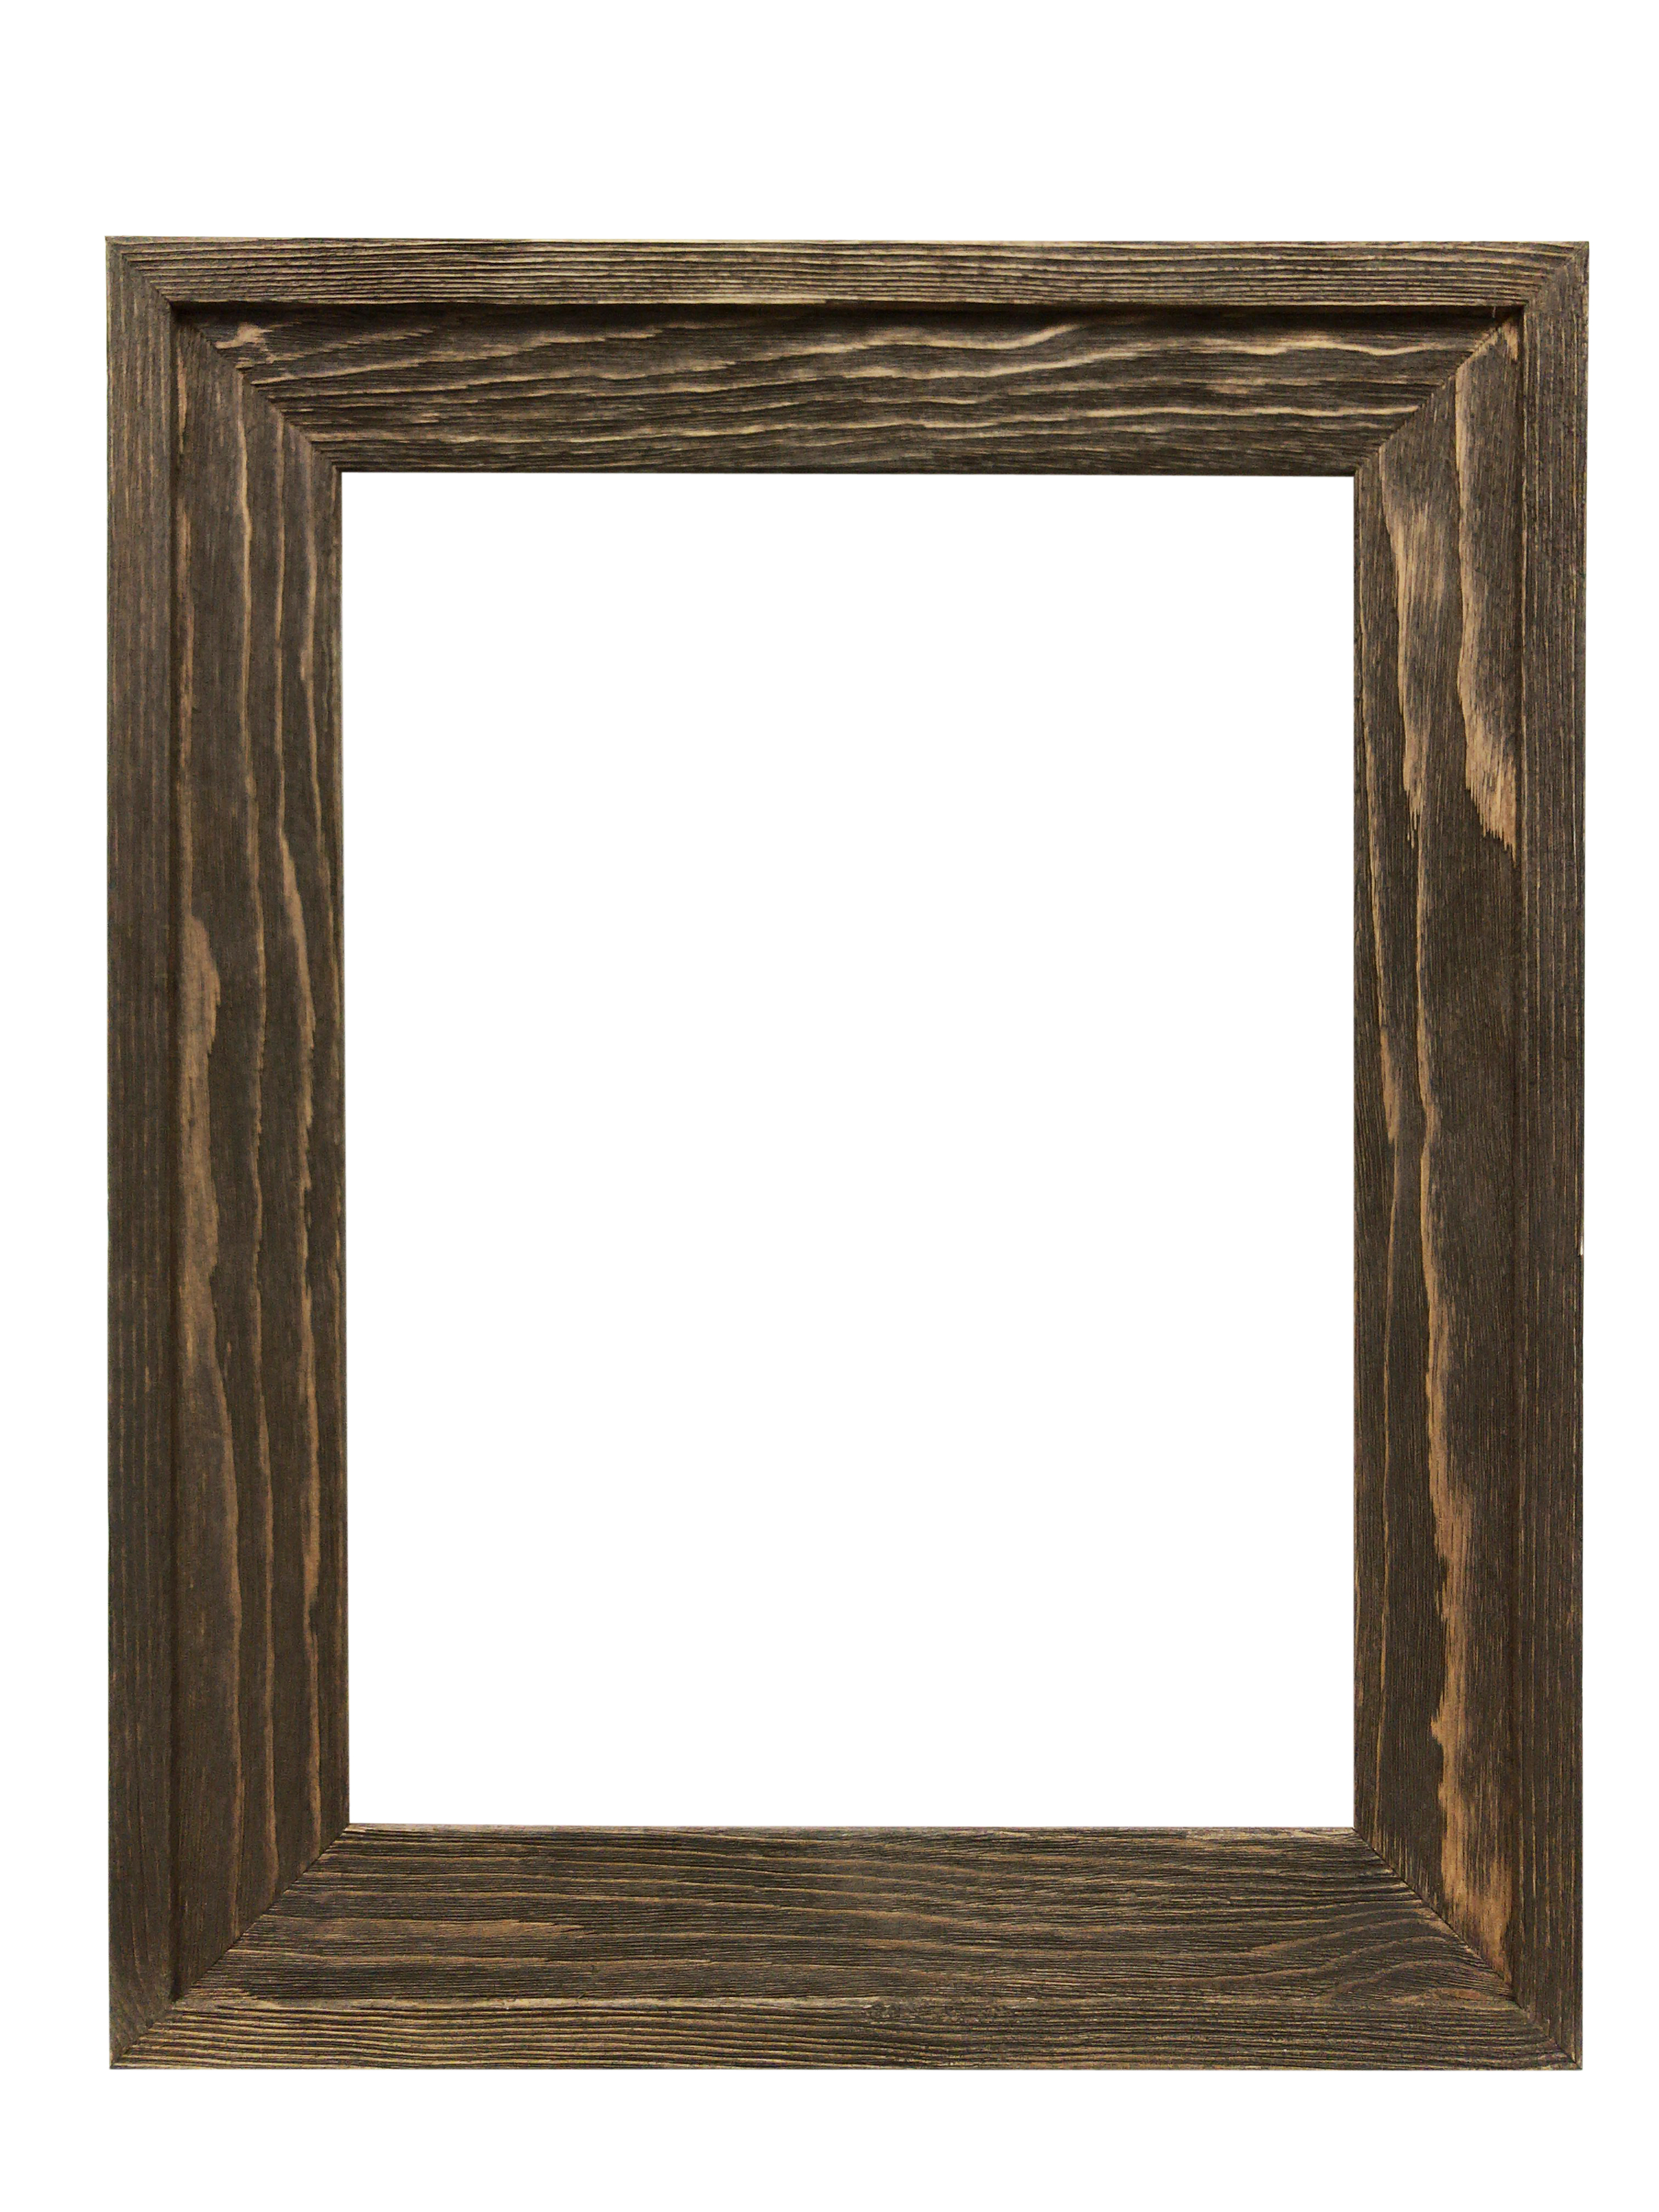
Building the Frame: Precision and Patience

Begin by meticulously measuring and cutting your chosen wood to the exact dimensions required for your mirror frame. Accurate measurements are crucial for a perfectly fitting frame. Use a miter saw for clean, 45-degree angle cuts, ensuring the joints align perfectly. Securely clamp the pieces together, applying wood glue to each joint before carefully screwing them together. Take your time; this is the structural backbone of your masterpiece.

Enhancing the Frame: Adding Intricate Details

Once the frame is assembled, you have the opportunity to add personalized details. Consider incorporating decorative elements such as molding, carvings, or inlaid designs. These additions can transform a simple frame into a stunning work of art. If you're aiming for a more minimalist look, you can opt for a clean, unadorned frame, letting the wood grain speak for itself.

Finishing Touches: Bringing Your Vision to Life

Sand the entire frame thoroughly, starting with coarser grit sandpaper and gradually moving to finer grits, to achieve a smooth, even surface. This meticulous sanding process will ensure a flawless finish. Apply your chosen stain or paint, following the manufacturer's instructions. Allow ample drying time before applying several coats of varnish or polyurethane for a protective layer that enhances the beauty and longevity of your creation. Once dry, carefully attach the mirror to the back of the frame using appropriate adhesive or mirror clips.

Displaying Your Masterpiece

Finally, admire your stunning handcrafted mirror! Choose a prominent location in your home to showcase your exquisite woodworking skills. This mirror will not only reflect your image but also the pride and artistry you poured into its creation. It's a perfect conversation starter, a testament to your dedication, and a stunning addition to any room.

Share:

Simple Easy Woodworking Project Ideas for Beginners

Simple and Satisfying Woodworking Projects for Novice Craftspeople

Embarking on a woodworking journey can be both rewarding and intimidating. The sheer variety of tools, techniques, and potential projects can feel overwhelming for beginners. However, with a focus on simplicity and achievable goals, even novice craftspeople can experience the satisfaction of creating functional and aesthetically pleasing items. This article presents a curated selection of easy woodworking projects ideally suited for individuals taking their first steps in this fulfilling craft.

Fundamental Projects: Mastering Basic Techniques

Before tackling more complex designs, it is crucial to establish a foundation in fundamental woodworking techniques. The following projects emphasize the acquisition of essential skills such as measuring, cutting, sanding, and finishing, paving the way for more ambitious endeavors.

1. The Simple Wooden Coasters

This project serves as an excellent introduction to basic woodworking principles. Using readily available materials such as inexpensive hardwood scraps or plywood, beginners can practice precise cutting with a hand saw or jigsaw. The process involves selecting square or rectangular pieces, carefully cutting them to the desired dimensions, and then sanding the edges to achieve a smooth finish. A simple coat of varnish or stain can add a touch of elegance. This project allows for experimentation with different wood types and finishes, fostering creativity while solidifying fundamental skills.

Materials Required: Hardwood scraps, hand saw or jigsaw, sandpaper (various grits), wood varnish or stain, measuring tape.

Key Skills Learned: Measuring accurately, precise cutting, sanding techniques, finishing application.

2. A Basic Wooden Box

Constructing a small wooden box is a step up from coasters, introducing the concept of joining wood pieces together. Simple butt joints can be employed, secured with wood glue and optionally reinforced with small brads or screws. This project reinforces accurate measuring and cutting skills while introducing the essential skill of assembling components. The box can be left plain or decorated with paint, decoupage, or burning, adding a personal touch.

Materials Required: Wood planks (sufficient for sides, bottom, and top), wood glue, brads or screws (optional), sandpaper, paint or decorative elements (optional).

Key Skills Learned: Accurate measuring and cutting, joining wood pieces, glue application, basic assembly, surface finishing.

3. A Simple Shelf

Building a small shelf is a slightly more involved project that builds upon the skills learned from the previous ones. It introduces the concept of creating supports and attaching the shelf to a wall. Using simple brackets or creating small legs from additional wood pieces, beginners can practice more complex cuts and learn about securing a structure to a wall surface. This is a functional project that can immediately improve organization in a home environment.

Materials Required: Wood plank for the shelf, wood for legs or brackets (optional), screws, wall anchors, sandpaper, wood stain or paint (optional).

Key Skills Learned: Advanced cutting techniques, creating supporting structures, using screws and wall anchors, assembling larger components.

Intermediate Projects: Refining Techniques and Expanding Creativity

Once comfortable with the fundamentals, novice woodworkers can progress to projects that incorporate more advanced techniques and allow for greater creative expression.

4. A Small Wooden Toy

Creating a simple wooden toy, such as a small car or a rocking horse, provides an excellent opportunity to explore more intricate cutting and shaping techniques. This project might require the use of a coping saw for curves, and potentially introducing the concept of sanding to smooth out curves and edges. The focus shifts towards precision and attention to detail, fostering a higher level of skill.

Materials Required: Wood blocks, coping saw, sandpaper (various grits), wood glue, non-toxic paints or stains (if intended for children).

Key Skills Learned: Curved cutting techniques, shaping wood components, fine sanding, attention to detail.

5. A Picture Frame

Constructing a picture frame requires careful measurement and precise miter cuts. This project introduces the use of miter boxes or miter saws for accurate angle cuts, a critical skill for creating frames and other projects with precise angles. A finished frame showcases the precision achieved through the mastering of more advanced cutting and joining methods.

Materials Required: Wood strips, miter box or miter saw, wood glue, clamps, sandpaper, finishing materials (paint, stain, varnish).

Key Skills Learned: Precise miter cutting, creating accurate joints, using clamps, finishing and detailing.

6. A Simple Birdhouse

Building a birdhouse is a rewarding project that integrates many previously learned skills. It requires planning, careful cutting, precise assembly, and attention to detail. This project encourages planning and design thinking and introduces the concept of functional woodworking, creating something that serves a purpose beyond aesthetics. The design can be customized to attract specific birds.

Materials Required: Wood planks, nails or screws, wood glue, sandpaper, weather-resistant paint or stain (optional).

Key Skills Learned: Planning and design, advanced cutting techniques, assembly of complex structures, understanding of functionality.

Essential Considerations for Beginners

Safety First: Always prioritize safety. Wear appropriate safety glasses, hearing protection (when using power tools), and dust masks. Ensure the work area is well-lit and clutter-free. Learn proper tool usage before operating any power tools.

Start Small: Begin with simpler projects to build confidence and skill. Avoid overly ambitious projects initially.

Practice Makes Perfect: Don't be discouraged by imperfections. Woodworking is a skill developed through practice and patience. Embrace mistakes as learning opportunities.

Seek Guidance: Consult online resources, woodworking books, and experienced woodworkers for advice and support. Many online communities offer valuable insights and troubleshooting assistance.

Enjoy the Process: Woodworking is a rewarding and therapeutic activity. Focus on enjoying the process of creation and the satisfaction of producing something tangible with your own hands.

By starting with these simple projects and consistently practicing, beginners can build a solid foundation in woodworking, fostering a lifelong passion for this enriching craft. Remember that patience, persistence, and a willingness to learn are key ingredients for success in this fulfilling endeavor.

Share:

Ultimate Guide to Woodworking Project Plans

The Ultimate Guide to Woodworking Project Plans

Embarking on a woodworking project requires meticulous planning and execution. While the allure of crafting beautiful and functional pieces from wood is undeniable, success hinges upon the careful selection and implementation of robust project plans. This comprehensive guide delves into the intricacies of woodworking project plans, offering a structured approach to ensure your projects are not only successful but also enjoyable.

Understanding the Importance of Comprehensive Plans

A well-defined woodworking project plan serves as the roadmap for your endeavor. It dictates every aspect, from material selection and cutting dimensions to assembly techniques and finishing processes. Neglecting this crucial step can lead to frustrating setbacks, material waste, and ultimately, a subpar finished product. A comprehensive plan minimizes errors, optimizes resource utilization, and fosters a more efficient and rewarding woodworking experience.

The Benefits of Detailed Planning:

  • Reduced Material Waste: Accurate planning minimizes material cuts and ensures efficient use of lumber.
  • Enhanced Accuracy: Detailed plans minimize errors in cutting and assembly, resulting in a more precise finished product.
  • Improved Efficiency: A clear plan streamlines the workflow, saving valuable time and effort.
  • Increased Satisfaction: Completing a project successfully boosts confidence and fosters a sense of accomplishment.
  • Cost Savings: Minimizing waste and errors translates to significant cost savings in both materials and time.

Sources and Types of Woodworking Project Plans

Numerous resources cater to woodworkers of all skill levels, offering a diverse range of project plans. Understanding these sources and the types of plans available is paramount in selecting the right blueprint for your project.

Locating Reliable Project Plans:

  • Online Databases and Websites: Numerous websites offer free and paid woodworking plans, ranging from simple to complex projects. Always verify the credibility of the source.
  • Woodworking Magazines and Books: Traditional print media often feature detailed plans accompanied by step-by-step instructions and photographs.
  • Commercial Plan Providers: Companies specialize in creating and selling detailed woodworking plans, often with accompanying videos and support.
  • Local Woodworking Clubs and Associations: Joining a local club provides access to experienced woodworkers and potentially shared plans.

Types of Woodworking Project Plans:

  • Detailed Drawings: These plans utilize precise measurements and annotations to illustrate each component and assembly step.
  • Step-by-Step Instructions: These plans provide written instructions accompanied by images or diagrams.
  • Video Tutorials: Videos demonstrate the entire process visually, ideal for visual learners.
  • 3D Models: Advanced plans utilize 3D models to allow for virtual assembly and visualization of the finished product.

Essential Elements of a Comprehensive Woodworking Project Plan

A truly comprehensive woodworking project plan should include several crucial elements to guide you through each stage of the process.

Material List:

This section should meticulously list all required materials, including wood type, dimensions, quantity, and any necessary hardware (screws, nails, glue, etc.). Specifying the type of wood (e.g., oak, pine, maple) and its grade is essential for ensuring consistent quality and appearance.

Cut List:

The cut list details the precise dimensions of each piece of wood required for the project. This list should account for allowances for joints, finishes, and potential errors. It is crucial to organize this list logically, perhaps grouping cuts by size or wood type for optimal efficiency during the cutting process.

Assembly Instructions:

Clear and concise assembly instructions are vital. These should be presented in a logical sequence, detailing each step with accompanying diagrams or photographs. The use of numbered steps enhances clarity and ensures that the assembly process proceeds smoothly.

Finishing Instructions:

The finishing instructions outline the necessary steps to protect and enhance the appearance of the finished product. This includes details on sanding, staining, painting, sealing, and any other relevant finishing techniques. Specifying the type of finish (e.g., varnish, polyurethane) and its application method is crucial for achieving the desired result.

Tools and Equipment List:

A thorough list of required tools and equipment ensures that you have everything needed before commencing the project. This list should be comprehensive, including hand tools, power tools, safety equipment, and any specialized tools required for specific joinery techniques.

Safety Precautions:

Safety should always be a paramount consideration. The project plan should include detailed safety precautions relevant to the specific tools and techniques employed. This includes wearing appropriate safety gear (eye protection, dust mask, hearing protection) and following safe operating procedures for power tools.

Adapting and Modifying Project Plans

While using established plans is advantageous, adapting them to suit individual needs and preferences is often necessary. Understanding how to modify plans safely and effectively is a valuable skill for every woodworker.

Modifying Dimensions:

Altering dimensions requires careful recalculation to ensure structural integrity and overall functionality. Minor adjustments are generally manageable, but significant changes necessitate a thorough review of all aspects of the plan.

Material Substitution:

Substituting materials requires consideration of their properties. Ensure that the replacement material possesses comparable strength, durability, and workability. Adjustments to joinery techniques might be necessary depending on the material's properties.

Adding or Removing Features:

Adding or removing features might require significant alterations to the original plan. This necessitates a thorough understanding of the project's structural integrity and the impact of the modifications on its overall design and functionality.

Conclusion

The development and utilization of comprehensive woodworking project plans are paramount to achieving successful and rewarding outcomes. By diligently following the guidelines outlined in this guide, woodworkers can significantly enhance their efficiency, reduce errors, and ultimately craft high-quality pieces that reflect their skill and creativity. Remember, a well-planned project is not just about the finished product; it's about the entire journey of learning, creating, and achieving a tangible representation of your efforts.

Share:

Furniture Business Plans for Success in the Home Furnishing Industry

Furniture Business Plans for Success in the Home Furnishing Industry

So, you're dreaming of launching your own furniture business? That's fantastic! The home furnishing industry is a vibrant and ever-evolving market, offering a huge potential for success. But let's be real, it's also fiercely competitive. To stand out and thrive, you need a solid plan. This isn't just about selling chairs and sofas; it's about crafting a brand, understanding your customers, and navigating the complexities of the market. Let's dive into the key elements of a winning furniture business plan.

1. Defining Your Niche and Target Market

Before you even think about sourcing furniture, you need to pinpoint your niche. What kind of furniture are you going to sell? Are you focusing on modern minimalist designs? Rustic farmhouse style? Luxury handcrafted pieces? Kids' furniture? Or maybe something super specific, like vintage mid-century modern re-upholstery? The more focused your niche, the easier it is to target your marketing and build brand recognition.

Understanding Your Ideal Customer

Once you've defined your furniture style, it's time to get to know your customer. Who are they? What are their lifestyles, preferences, and budgets? Are they young professionals looking for stylish, affordable pieces? Established families seeking durable, kid-friendly furniture? High-net-worth individuals craving bespoke luxury? Creating detailed customer personas will help you tailor your marketing, product selection, and overall brand messaging to resonate with your target audience. Think about their demographics, psychographics, and even their online behavior.

2. Sourcing and Inventory Management

This is where the rubber meets the road. How are you going to get your furniture? There are several options:

  • Manufacturing your own furniture: This gives you complete control over quality and design but requires significant upfront investment in machinery, skilled labor, and a production facility.
  • Wholesale partnerships: Partnering with established furniture manufacturers allows you to access a wider range of products without the overhead of manufacturing. Negotiating favorable terms and finding reliable suppliers is key here.
  • Dropshipping: A lower-risk option, dropshipping involves partnering with a supplier who handles inventory and shipping. However, you'll have less control over quality and shipping times. Your profit margins might also be slimmer.
  • Reselling/Consignment: This could involve buying and reselling vintage or antique furniture, or partnering with local artisans to sell their work on consignment.

Regardless of your chosen sourcing method, effective inventory management is crucial. You need a system to track your stock levels, manage orders, and minimize storage costs. Investing in inventory management software can be a game-changer.

3. Pricing Strategy

Getting your pricing right is essential for profitability. You need to consider your costs (sourcing, manufacturing, shipping, marketing), your desired profit margin, and the competitive landscape. A common approach is cost-plus pricing, where you add a markup to your cost of goods. However, you might also consider value-based pricing, where you set prices based on the perceived value of your furniture to the customer. Research your competitors' pricing to ensure your strategy is competitive but also profitable.

4. Marketing and Sales Strategy

Even the best furniture won't sell itself. A robust marketing and sales strategy is vital. Consider these avenues:

  • E-commerce website: A professional, user-friendly website is essential in today's market. High-quality product photography and detailed descriptions are crucial.
  • Social media marketing: Platforms like Instagram and Pinterest are ideal for showcasing your furniture visually. Engage with your audience, run targeted ads, and collaborate with influencers.
  • Content marketing: Create valuable content like blog posts, articles, and videos related to home décor and furniture styling to attract and engage your target audience.
  • Local partnerships: Collaborate with interior designers, architects, and other businesses in the home furnishing industry to reach a wider audience.
  • Traditional advertising: Consider print ads in local magazines or newspapers, depending on your target market.

5. Operations and Logistics

Efficient operations are key to a smooth customer experience. This includes order fulfillment, shipping, delivery, and potentially assembly services. Do you offer in-home delivery and assembly? What's your return policy? Having well-defined processes and systems in place will ensure a seamless and positive experience for your customers.

6. Financial Projections and Funding

A detailed financial plan is crucial for securing funding and tracking your business's performance. You'll need to create realistic projections for revenue, expenses, and profitability. This will help you determine how much funding you need to get started and how you'll manage your cash flow.

7. Legal and Regulatory Compliance

Ensure you comply with all relevant legal and regulatory requirements, including business licenses, permits, and tax obligations. You might also need to consider insurance policies to protect your business from liability.

8. Customer Service

Exceptional customer service is essential for building brand loyalty and repeat business. Respond promptly to inquiries, resolve issues efficiently, and go the extra mile to create a positive customer experience. Consider offering warranties or guarantees on your furniture to build trust.

Commonly Asked Questions

Q: How much money do I need to start a furniture business?

A: This depends heavily on your chosen business model (manufacturing, wholesale, dropshipping, etc.), the scale of your operations, and your inventory needs. It could range from a few thousand dollars to hundreds of thousands, or even millions for large-scale manufacturing.

Q: What are the biggest challenges in the furniture industry?

A: Competition is fierce, and managing inventory and logistics can be complex. Staying up-to-date with trends and customer preferences is also crucial for success.

Q: How important is online presence?

A: In today's market, a strong online presence is absolutely essential. A professional website and active social media presence are key for reaching customers and building your brand.

Q: What kind of legal structure should I choose?

A: Consult with a legal professional to determine the best legal structure for your business (sole proprietorship, LLC, partnership, etc.). The choice will impact your liability, taxation, and administrative burden.

Starting a furniture business is an exciting venture, but it takes careful planning and execution. By focusing on these key areas and adapting your strategy to your specific niche and target market, you'll be well on your way to building a successful and thriving furniture business.

Share:

Unique Wooden Candle Holder Designs for Every Room in Your Home

Unique Wooden Candle Holder Designs for Every Room in Your Home

Unique Wooden Candle Holder Designs for Every Room in Your Home

Candlelight has a magical way of transforming a space, adding warmth, ambiance, and a touch of serenity. And what better way to showcase your flickering flames than with a beautiful and unique wooden candle holder? Wood, with its natural beauty and versatility, offers endless possibilities for creating eye-catching and functional designs. Whether you're seeking rustic charm, modern elegance, or something in between, wooden candle holders can elevate the décor of every room in your home.

Embracing Rustic Charm

For a cozy and inviting atmosphere, rustic wooden candle holders are a perfect choice. Imagine a chunky, weathered log transformed into a candle holder with a simple, yet elegant design. These holders often feature natural bark accents or knots, showcasing the raw beauty of the wood. To add a touch of warmth, consider holders with a distressed finish or a light stain that highlights the wood's grain. These rustic pieces are perfect for living rooms, bedrooms, or even your porch, bringing a touch of nature indoors.

Creative Rustic Ideas

  • Reclaimed wood candle holders: Give old wood a new life by crafting a unique candle holder. Look for weathered pieces like old barn wood or salvaged pallets.
  • Tree stump candle holders: Transform a slice of a tree trunk into a stunning centerpiece. You can leave the bark intact or carve out a simple design.
  • Driftwood candle holders: Embrace the beachy vibe with driftwood candle holders. These naturally sculpted pieces offer a unique and organic aesthetic.

Modern Elegance with Wood

Wood can be just as sleek and contemporary as any other material. Modern wooden candle holders often feature clean lines, geometric shapes, and minimalist designs. Choose holders with a smooth, polished finish, perhaps in a dark wood like walnut or ebony. These minimalist pieces add a sophisticated touch to modern living spaces, dining rooms, or even home offices. They can be used to create a calming and focused atmosphere, making them perfect for meditation or relaxation.

Modern Wooden Candle Holder Ideas

  • Geometric candle holders: Embrace the modern aesthetic with holders that feature geometric shapes like triangles, squares, or cylinders.
  • Metal and wood combinations: Combine the warmth of wood with the sleekness of metal for a truly modern look. Look for holders with brass accents, or those where wood frames a metal base.
  • Scandinavian-inspired designs: Embrace the simplicity and functionality of Scandinavian design with holders featuring clean lines and natural wood finishes.

Beyond the Ordinary: Unique Wooden Candle Holder Designs

For those seeking truly one-of-a-kind designs, the possibilities are endless. Artisans and woodworkers are pushing boundaries, creating intricate, handcrafted wooden candle holders that are both functional and artistic. From intricate carvings and laser-cut designs to holders that incorporate natural elements like shells or stones, these pieces are statement makers. Consider a wooden candle holder that resembles a miniature sculpture or one that incorporates sustainable materials and eco-friendly practices.

Unique Wooden Candle Holder Inspiration

  • Sculptural designs: Seek out holders that have been crafted into unique shapes, mimicking natural forms or abstract ideas.
  • Intricate carving: Look for holders that showcase intricate carvings, perhaps featuring floral motifs, animal designs, or geometric patterns.
  • Personalized designs: Commission a custom-made wooden candle holder that incorporates a special message, date, or personal symbol.

Wooden candle holders are more than just functional accessories; they are pieces of art that bring warmth, light, and personality to your home. Whether you choose a rustic, modern, or uniquely crafted design, let the natural beauty of wood illuminate your space and inspire a sense of tranquility and comfort.

Share:

How to Build Floating Shelves for a Sleek, Contemporary Look

How to Build Floating Shelves for a Sleek, Contemporary Look

Elevate Your Space: Building Sleek Floating Shelves for a Contemporary Vibe

Floating shelves offer a contemporary, minimalist aesthetic that instantly elevates any room. They create a sense of spaciousness and showcase your prized possessions in a stylish way. This guide will walk you through the process of building your own floating shelves, empowering you to personalize your space and add a touch of sophistication.

Choosing Your Materials

The first step is to select the materials that will best suit your design vision and the weight of the items you plan to display. Consider these factors:

Wood Type

Opt for a wood with a clean, contemporary feel, like:

  • Maple: Known for its light color and smooth grain.
  • Walnut: Boasts a rich, dark hue and distinctive grain pattern.
  • Birch: Offers a pale, slightly reddish tone and a fine, consistent grain.
  • Oak: Provides a sturdy, traditional option with a pronounced grain.

Thickness

The thickness of the shelf will determine its stability and aesthetic. A thickness of ¾ to 1 inch is recommended for most applications.

Hardware

Select strong, durable hardware that will seamlessly integrate into the design:

  • Concealed Brackets: These are ideal for achieving a truly floating look. Choose brackets made from metal or sturdy plastic.
  • Screws: Use screws that are long enough to securely fasten the brackets to the wall and the shelf to the brackets.

Planning and Measuring

Before you begin cutting and assembling, take accurate measurements and plan the placement of your shelves.

Determine Shelf Placement

Decide on the height and spacing of your shelves. Use a level to ensure your shelves will be perfectly aligned. Mark the wall using a pencil to indicate the desired shelf locations.

Measure and Cut

Cut your wood to the desired lengths using a miter saw, circular saw, or hand saw. Make sure the cuts are precise for a clean, professional look. Use sandpaper to smooth the edges and create a polished finish.

Installing the Shelves

Now, it's time to bring your design to life.

Attaching Brackets

Locate and mark the positions for your brackets on the wall. Using a drill and the appropriate drill bit, create pilot holes to prevent the wood from splitting. Secure the brackets to the wall using screws.

Mount the Shelves

Position the shelves onto the brackets and secure them using the chosen screws. Ensure the shelves are level and aligned. If using concealed brackets, ensure the screws are completely concealed behind the shelves for a clean and seamless finish.

Finishing Touches

Once your shelves are installed, take a step back and admire your handiwork. Add these final touches to complete your design:

Stain or Paint

Apply a stain or paint to enhance the natural beauty of the wood or to create a desired color scheme. Allow the finish to dry completely before adding any items to the shelves.

Decorate

Showcase your style with carefully curated objects, books, or artwork. Arrange items strategically to create visual interest and balance. Consider the color palette and overall theme of your space.

Now that you've successfully built and installed your floating shelves, you can bask in the satisfaction of creating a custom design element that elevates your room. As you admire your handiwork, remember the endless possibilities and the unique personality your floating shelves bring to your space.

Share:

Rustic Wood Picture Frames for Craft Markets

Rustic Wood Picture Frames for Craft Markets

Rustic Wood Picture Frames: A Perfect Addition to Your Craft Market Stall

Looking for a handmade product that screams "cozy cabin" and "farmhouse chic"? Look no further than rustic wood picture frames! These charming frames are a hot commodity at craft markets, appealing to a wide range of customers who appreciate the natural beauty and unique character of wood. They're not just frames; they're little pieces of art themselves!

But don't just take my word for it. Let's dive into the reasons why rustic wood picture frames are a fantastic choice for your craft market business.

Why Rustic Wood Picture Frames Are a Winner

Here's the deal: people are drawn to the rustic aesthetic. It brings a sense of warmth, comfort, and connection to nature. These frames fit perfectly into this trend, adding a touch of handcrafted charm to any space.

Uniqueness and Versatility

Each piece of wood has its own unique grain pattern, knots, and character. This means that no two frames will ever be exactly alike, making them truly one-of-a-kind. They can be styled in countless ways, from minimalist and modern to shabby chic and farmhouse. This versatility allows you to cater to a broad range of tastes.

High Perceived Value

Handmade items, especially those made with natural materials like wood, are perceived as higher quality and more valuable. This allows you to price your frames competitively and still make a good profit. The craftsmanship and attention to detail will speak for themselves!

Endless Customization Options

The beauty of rustic wood picture frames is that you can personalize them in so many ways. Think about offering:

  • Different wood types: Oak, pine, walnut, reclaimed wood â€" each has its own unique look and feel.
  • Various sizes and shapes: Square, rectangle, round, oval â€" cater to different picture sizes and styles.
  • Finishing options: Natural, stained, painted, distressed, weathered â€" unleash your creativity and offer a range of finishes to match different decor.
  • Embellishments: Add a touch of flair with rope, twine, burlap, metal accents, or even dried flowers.

Customization adds value and allows customers to truly make the frame their own, making them even more special.

Crafting Your Rustic Wood Picture Frames

Now, let's talk about the fun part â€" actually making these beauties! Here's a breakdown of the process:

1. Gathering Your Materials

You'll need:

  • Wood (look for salvaged wood for a more rustic look)
  • Saw (for cutting the wood)
  • Sandpaper (for smoothing the edges and creating a consistent surface)
  • Clamps (for securing the frame pieces together)
  • Wood glue (for bonding the frame pieces)
  • Finishing supplies (stain, paint, sealant, etc.)
  • Hardware (hinges, picture hangers, glass or acrylic sheet)
  • Embellishments (optional)

2. Cutting and Assembling

Once you've gathered your materials, it's time to cut your wood to the desired dimensions. You can use a table saw, circular saw, or even a hand saw. Be sure to cut accurately and measure twice, cut once! Once you have your pieces, use wood glue and clamps to assemble the frame. Allow the glue to dry completely before proceeding to the next step.

3. Sanding and Finishing

Smooth out any rough edges and imperfections by sanding the frame. Start with a coarser grit sandpaper and then move to a finer grit for a smoother finish. Apply your chosen finish, whether it's a stain, paint, or sealant. Let the finish dry completely before adding hardware.

4. Adding Hardware and Embellishments

Attach the hinges and picture hangers to the back of the frame. You can also choose to add a glass or acrylic sheet to protect the artwork. Get creative with embellishments â€" add some rope, twine, or other decorative touches to give your frames a unique personality.

Selling at Craft Markets

Now you're ready to sell your creations! Here are some tips for success:

  • Showcase your frames beautifully: Use a variety of sizes, finishes, and embellishments to showcase your range. Arrange them in a visually appealing way, with a clear price tag for each frame.
  • Highlight your craftsmanship: Let people know you're creating handmade items and highlight the unique aspects of each frame. Tell stories about the wood you use and the process you follow.
  • Offer customization: Allow customers to choose the size, finish, and embellishments for their frames. This adds a personal touch and increases the value of your products.
  • Be engaging and friendly: Interact with customers, answer their questions, and offer suggestions. Your passion for crafting will be contagious!
  • Promote your business: Share photos of your frames on social media, create a website or Etsy shop, and consider participating in local craft fairs.

Commonly Asked Questions

What kind of wood should I use for rustic picture frames?

The best wood for rustic frames depends on the look you're going for. Pine is readily available, affordable, and has a beautiful grain pattern. Reclaimed wood is a great choice for a unique and eco-friendly look. Oak is more durable and has a timeless elegance. Experiment with different woods to see what fits your style.

How do I make my frames look more rustic?

To achieve a rustic look, consider using distressed finishes, weathered paint, or even a mix of both. Add knots, cracks, or imperfections to the wood. You can also use embellishments like burlap, rope, or metal accents that complement a rustic style.

What are some tips for pricing my rustic wood picture frames?

Factor in the cost of materials, your time investment, and the perceived value of your handmade creations. Research the prices of similar frames in your area. You can offer different pricing tiers based on the size, complexity, and materials used. Be confident in your pricing, as customers will recognize the quality and craftsmanship of your work.

So, there you have it! Rustic wood picture frames are a fantastic business opportunity, combining creative expression with a hot market trend. Get crafting, and watch your business flourish!

Share:

人気の投稿

Powered by Blogger.